


The easiest way to add scrolling effects to Divi website is by using its built-in Scroll Effects feature. You can also use Interactions to create scroll-based animations. Both options are great for adding simple scroll animations.
However, if you want more advanced control over animations, triggers, and motion behavior, you'll need a plugin like DiviMotion. It's a GSAP-powered animation plugin that lets you build complex scroll effects with just a few clicks.
In this guide, we'll show you how to add scrolling effects to Divi website using both the built-in settings and the DiviMotion plugin.
Let’s get started.
Method 1: Add Scrolling Effects Using Divi's Scroll Effects
Divi comes with built-in Scroll Effects that make it easy to add scroll-based animations to any Divi element.
Here is how to use the Scroll Effects:
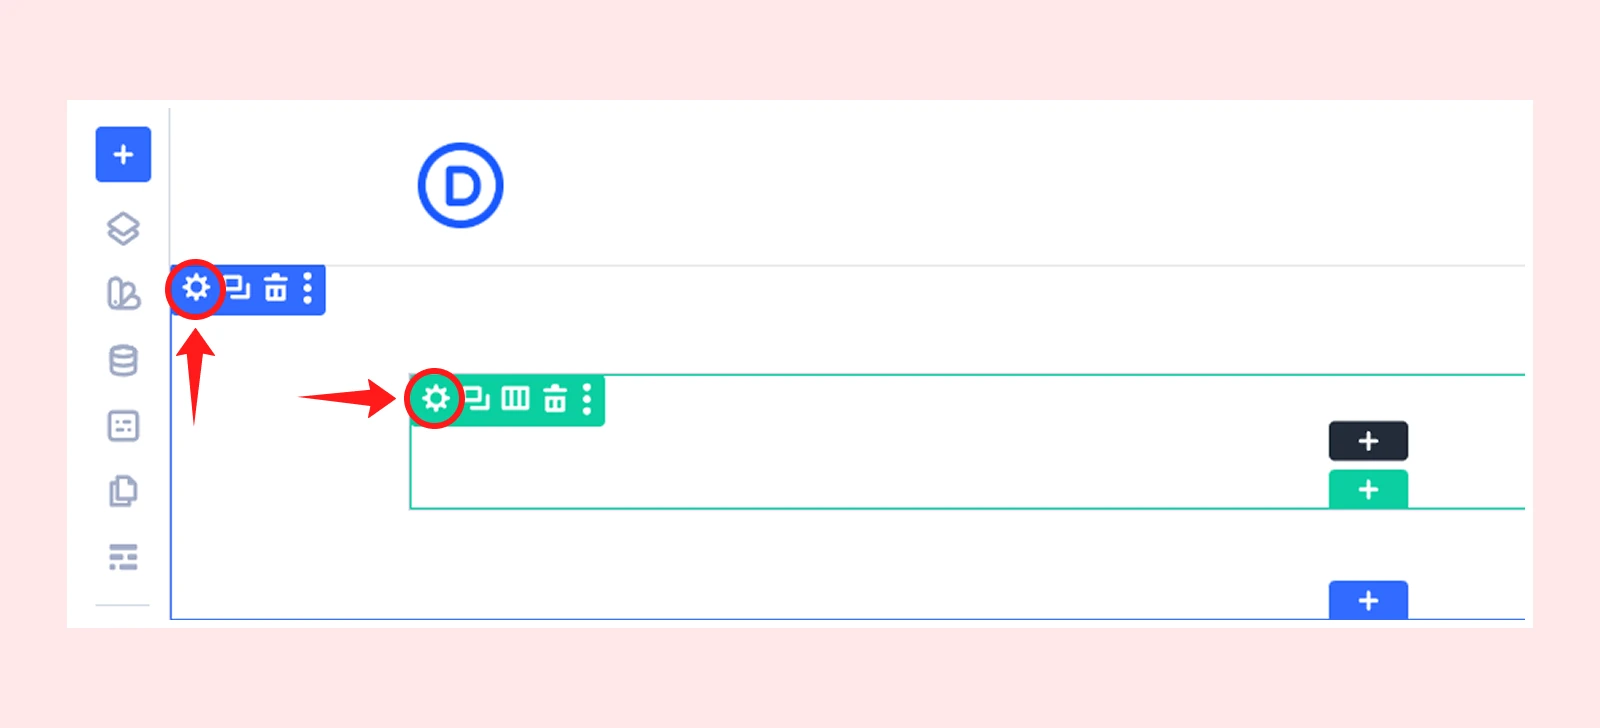
Step 1: Open the element settings
Open the Divi Visual Builder and select the section, row, column, or module you want to animate. Then click on your selected element’s gear icon.
Step 2: Go to Scroll Effects
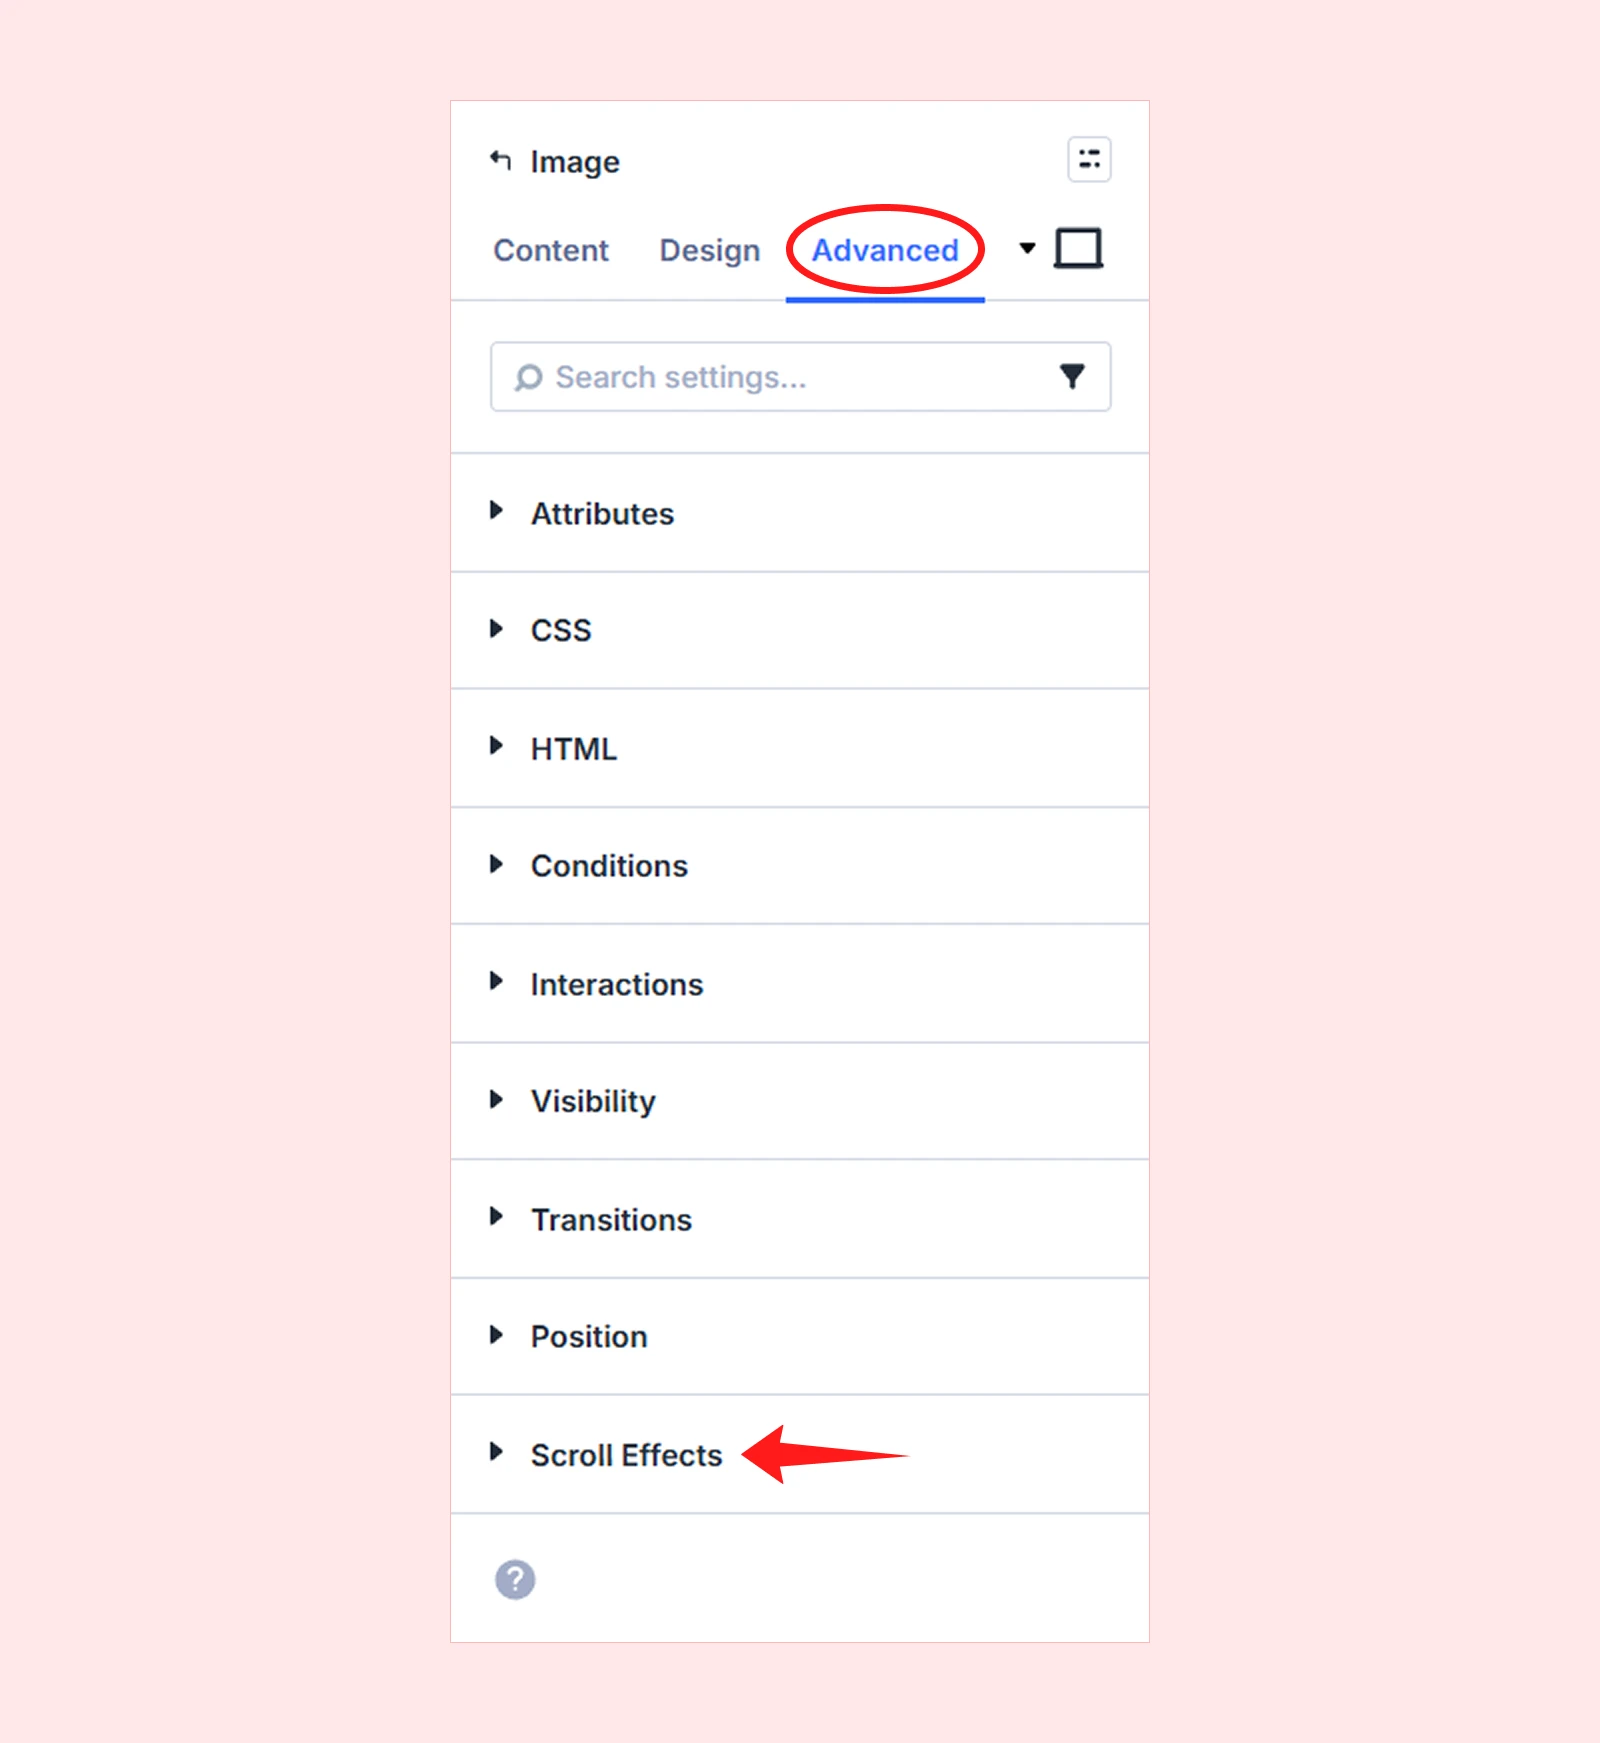
Next, navigate to the Advanced tab and open Scroll Effects.
Step 3: Choose an Effect
Choose the animation effect you want to apply and enable it. Here are the available effects:
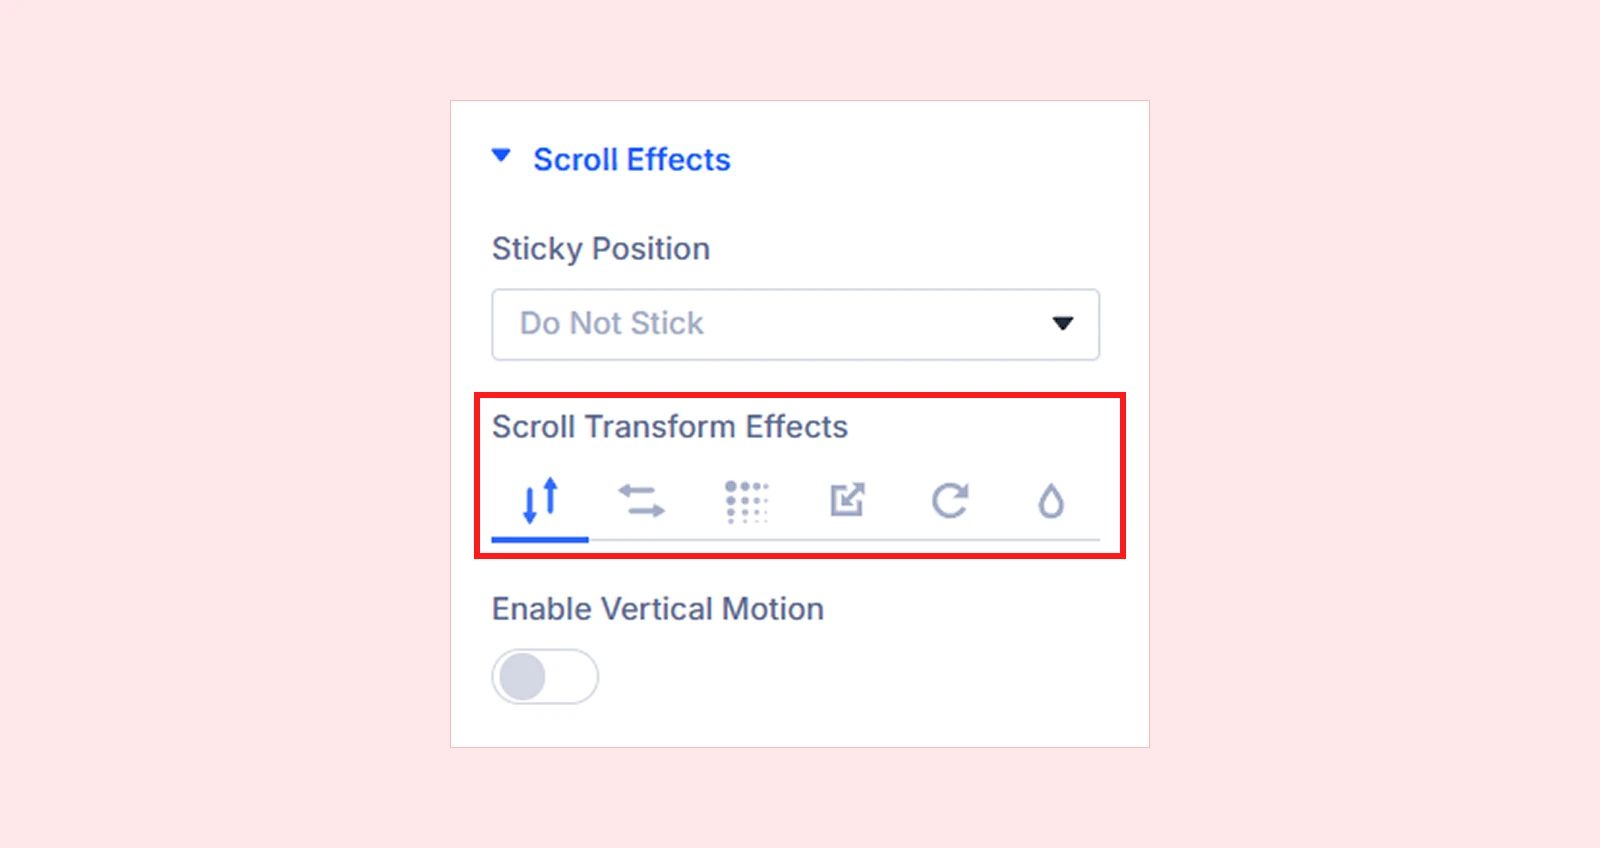
- Vertical Motion
- Horizontal Motion
- Fade
- Scaling
- Rotation
- Blur
Note: We have a dedicated guide on how to add horizontal and vertical scrolling effects to a Divi website that you can check out.
Step 4: Fine-tune the settings
There you will also find settings to control how the animation behaves during scrolling. Here are the available settings:
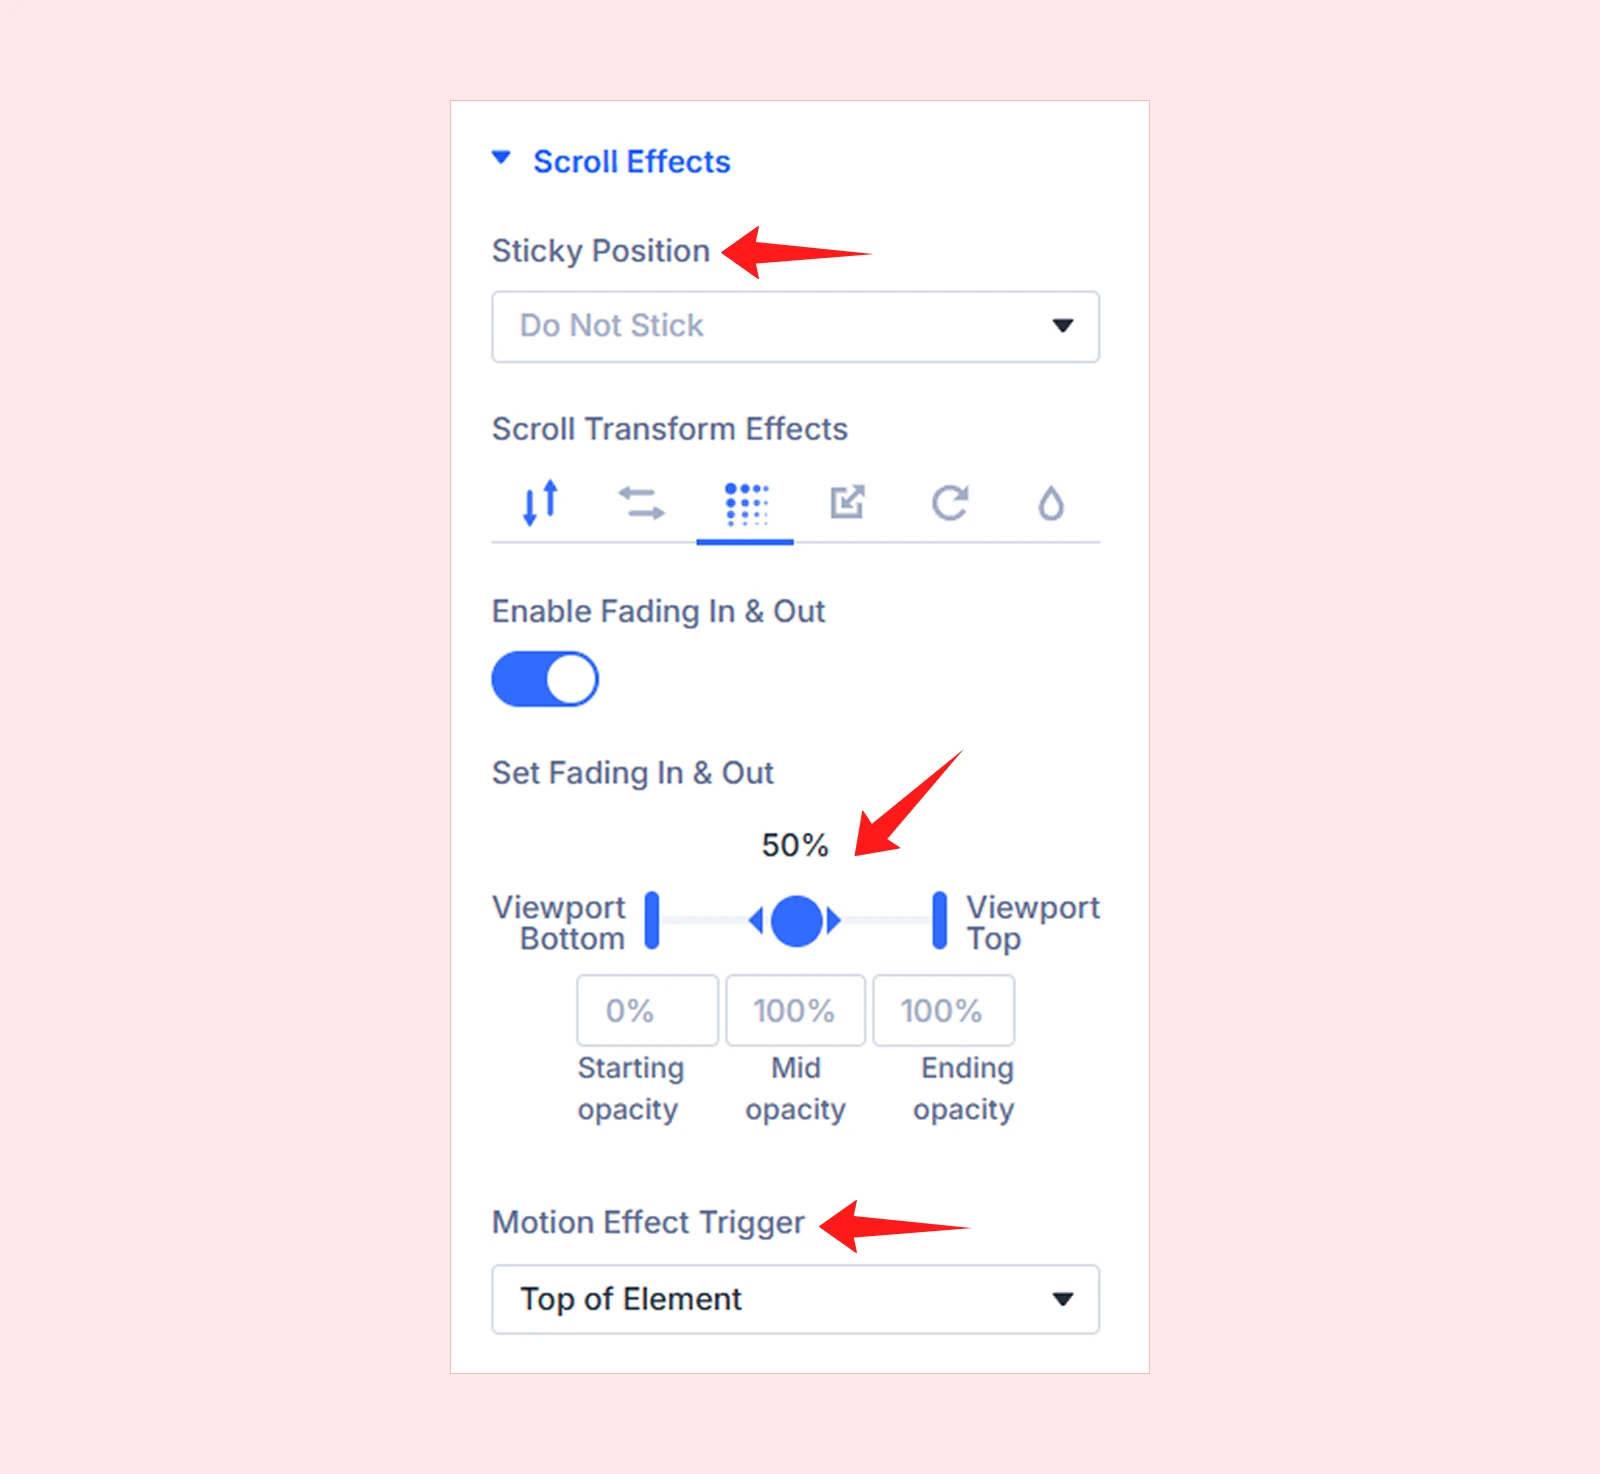
- Sticky Position: Pins the element to the top, bottom, or both edges while scrolling past it.
- Viewport range: Defines when the animation begins and ends relative to the screen.
- Motion Effect Trigger: Sets whether the effect is based on the top, middle, or bottom of the element entering the viewport.
Note: Based on your selected sticky position, you will see different configuration options and behavior controls.
Step 5: Save your changes
Click Save to apply the scrolling effect.
Method 2: Add Scrolling Effects Using Divi's Interaction Settings
Divi 5 introduces Interactions, a flexible way to create trigger-based animations. It includes options like “Viewport Enter” and “Viewport Exit,” which let you build smooth scroll-based effects as users move through the page.
Here is how to use interaction for creating scrolling effect in Divi:
Step 1: Open the Element Settings
Open the Divi Builder and select any section, row, column, or module and open its settings.
Step 2: Go to Interactions Settings
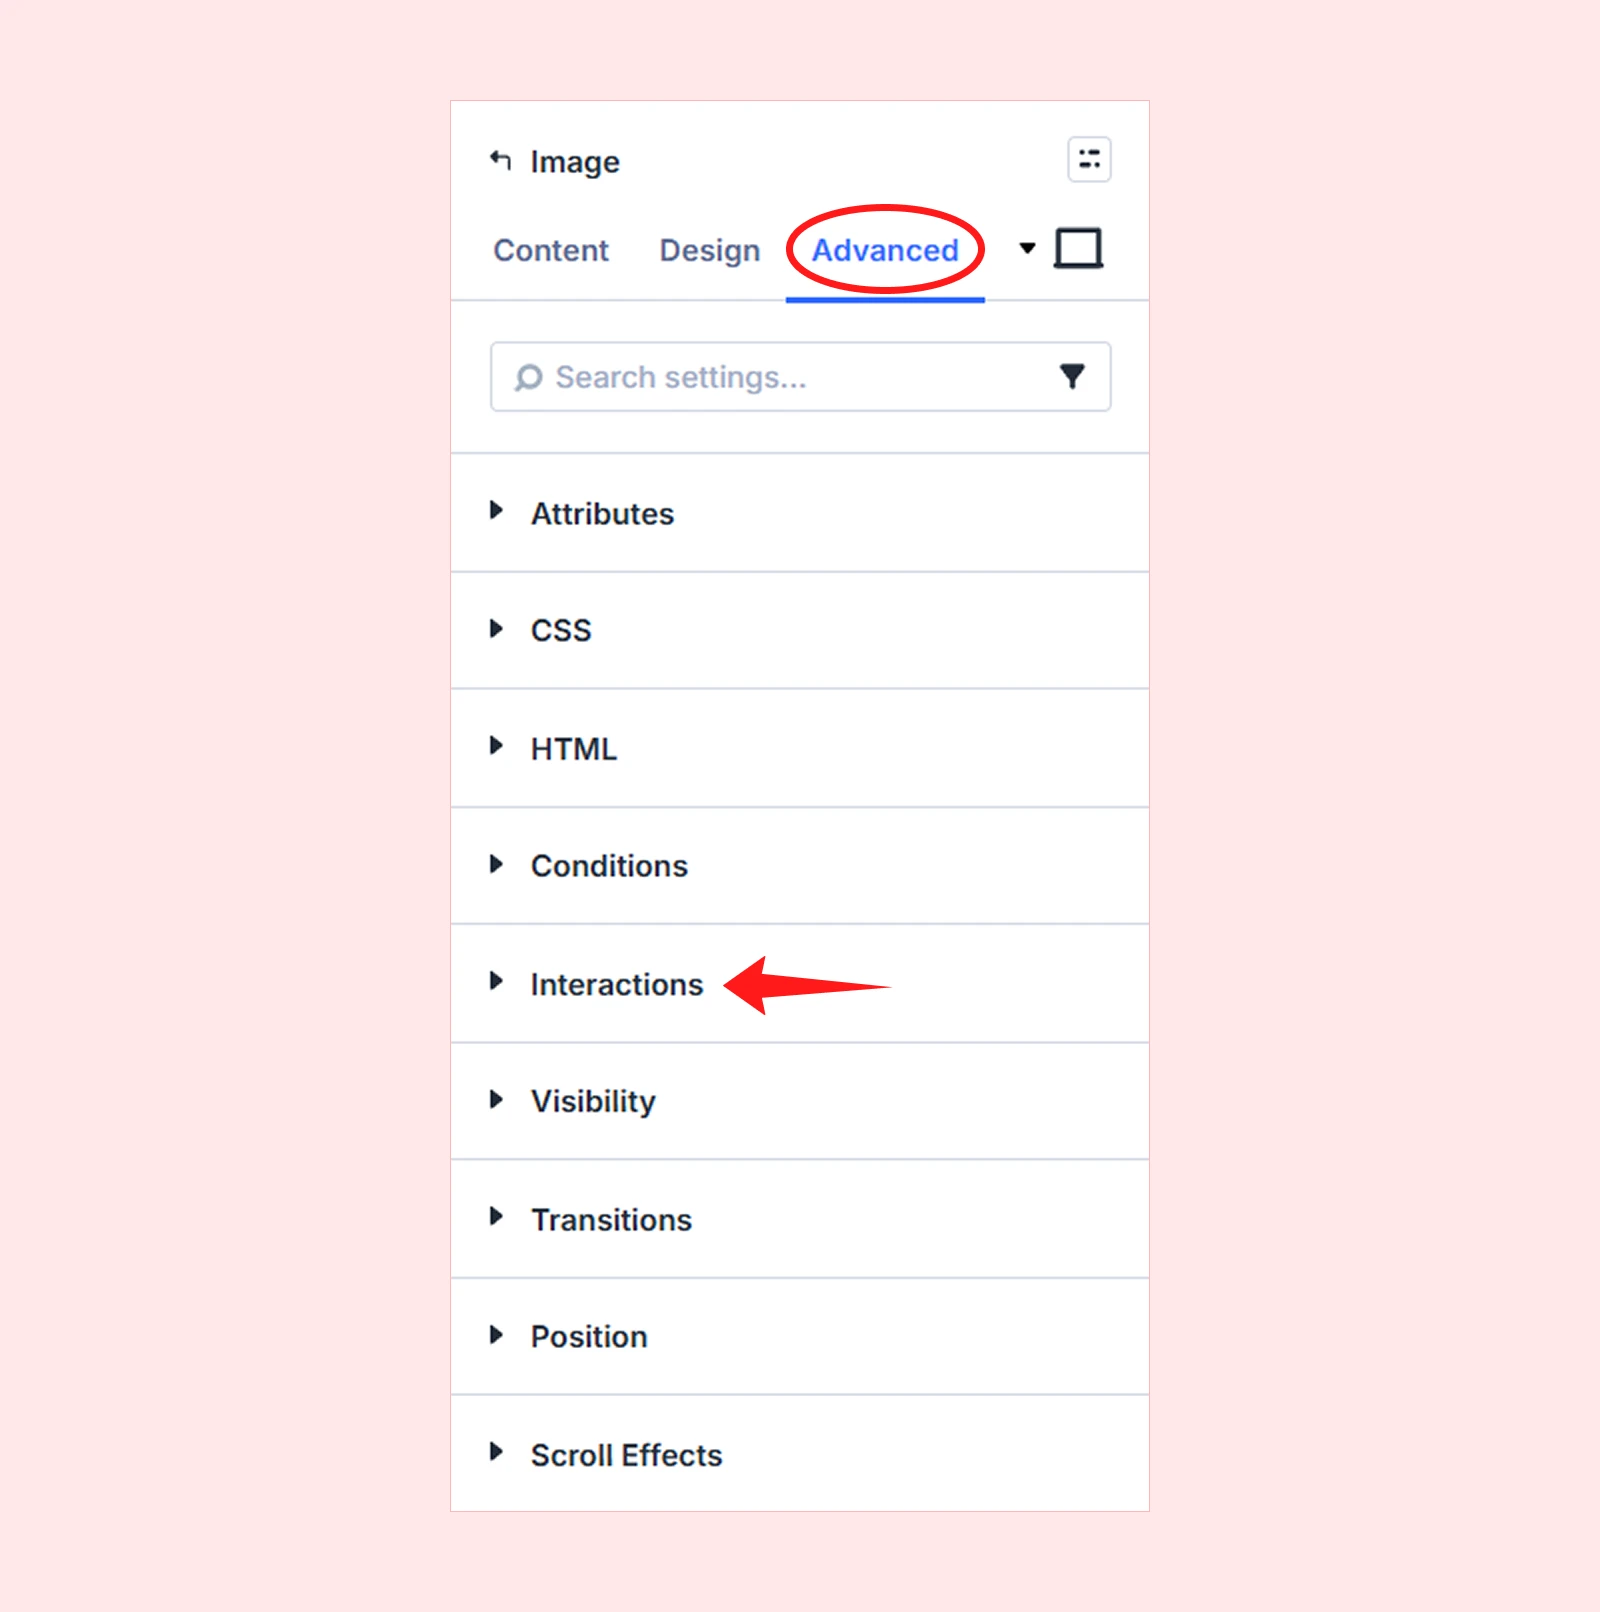
Navigate to the Advanced tab and open Interactions.
Step 3: Choose a Trigger
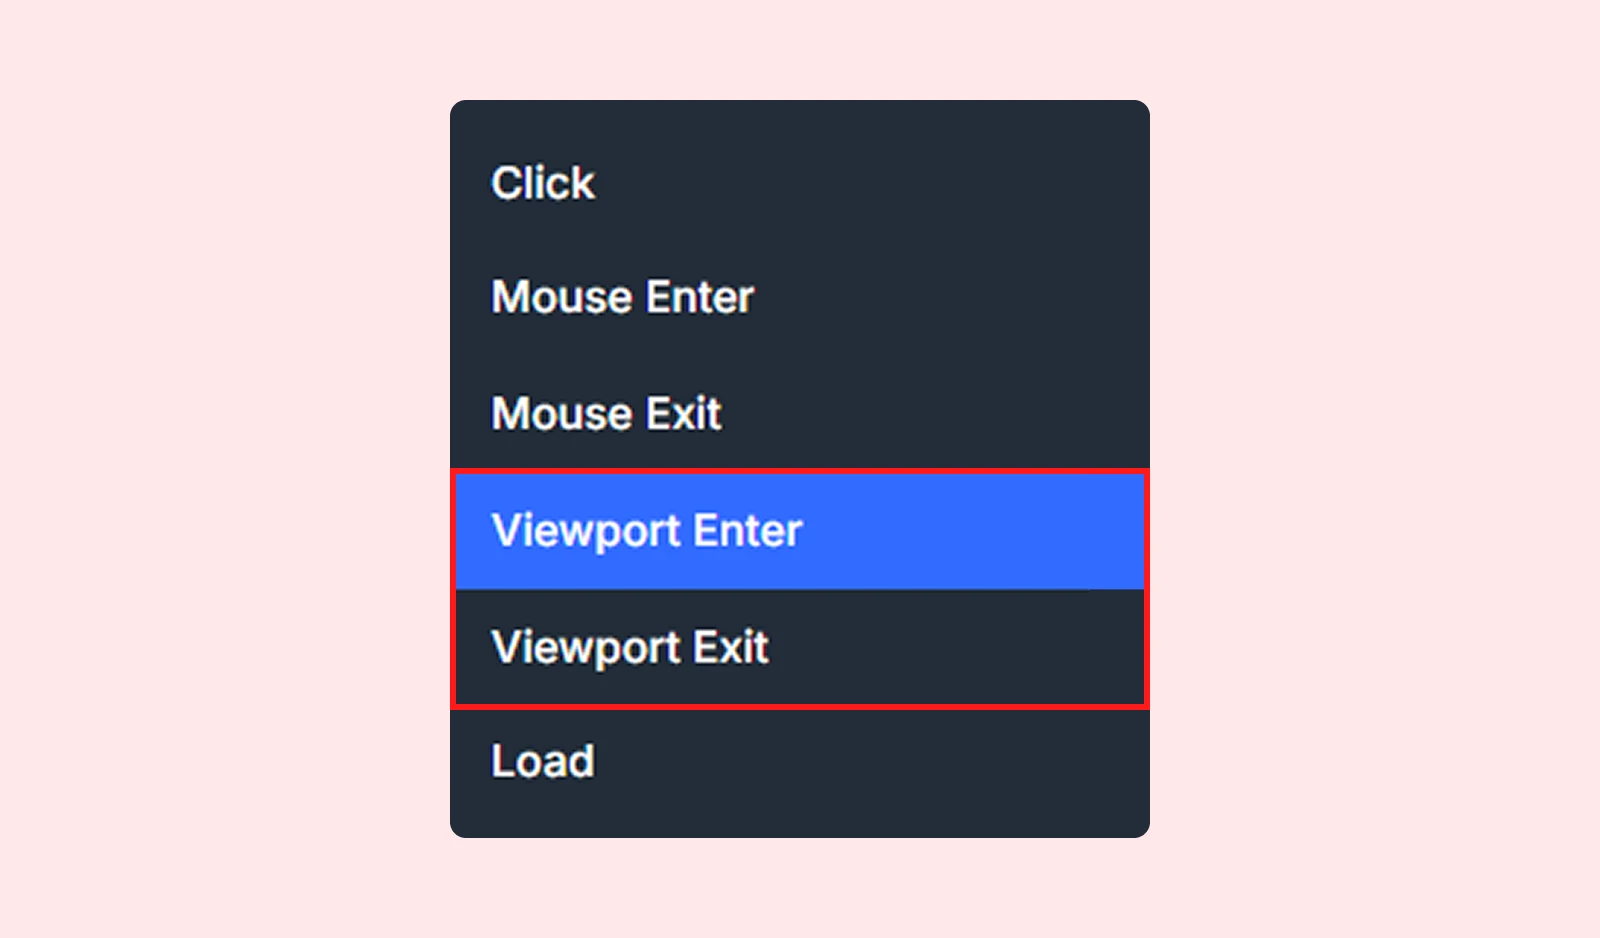
Select when the interaction should happen and there you will find 8 trigger types. To add scroll animation, interaction has two triggers:
- Viewport Enter: Triggers the animation as soon as the element enters the viewport. It’s best for creating smooth, one-time scroll-in effects.
- Viewport Exit: Triggers the animation when the element leaves the viewport. It’s mainly used to hide, reset, or reverse an effect after the user has scrolled past the element, so the animation can run again when the element comes back into view.
Step 4: Choose an Action
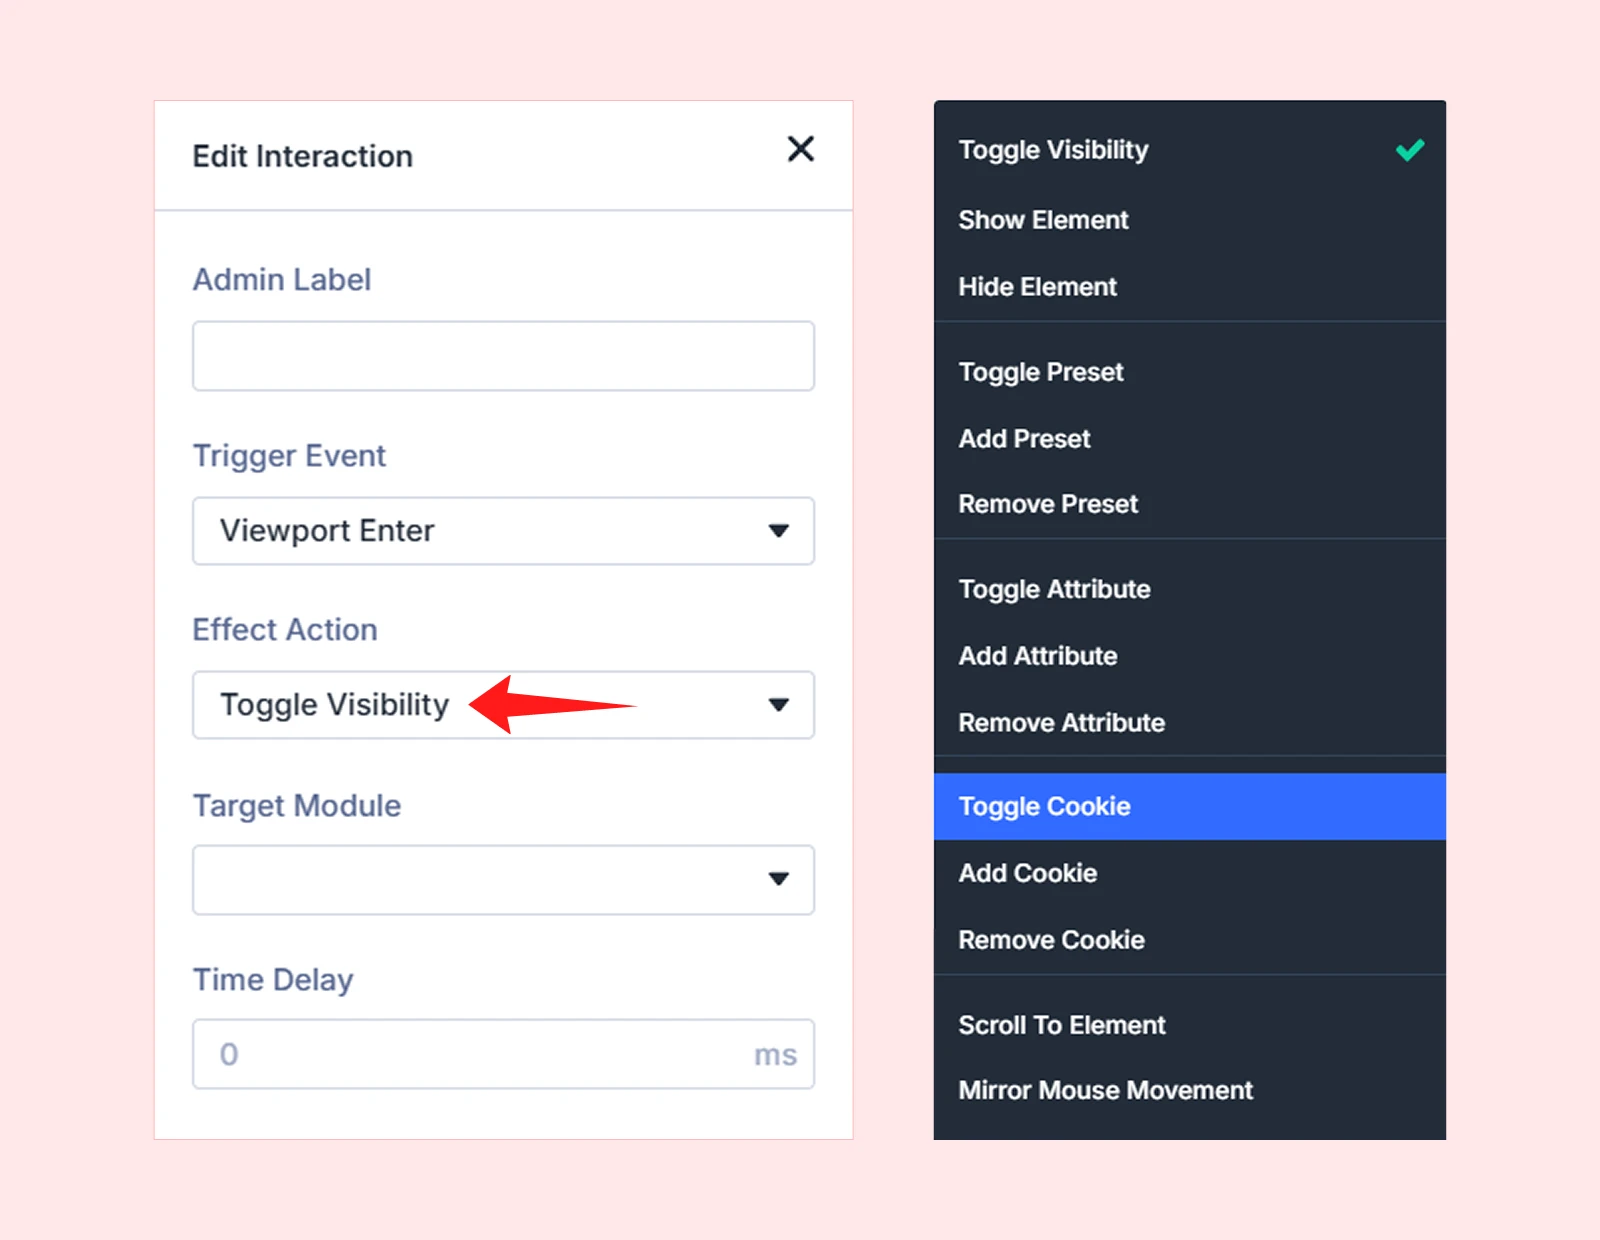
When you select a trigger type, for example Viewport Enter, it will open a new settings panel. From there, click on “Effect Action” to choose what you want the element to do when the trigger is activated.
Here are the available effect actions:
- Toggle Visibility
- Show / Hide Element
- Add / Remove Preset
- Scroll to Element
- Toggle / Add / Remove Attribute and more.
Step 5: Save Your Changes
Click Save to apply the interaction.
Method 3: Add Scrolling Effects Using DiviMotion Plugin
While Divi’s built-in settings are good for basic effects, DiviMotion is designed for advanced scroll animations. It integrates with GSAP tools like ScrollTrigger and ScrollSmoother.
So that you can create more powerful, smoother, and highly customizable scrolling effects that go beyond what Divi offers by default. Here is how to use DiviMotion to create scrolling effects:
Step 1: Open the Visual Builder
Go to the page where you want to add scrolling effects and enable the Visual Builder.
Step 2: Select an Element
Choose a section, row, column or module to animate and open its settings.
Step 3: Open DiviMotion Settings
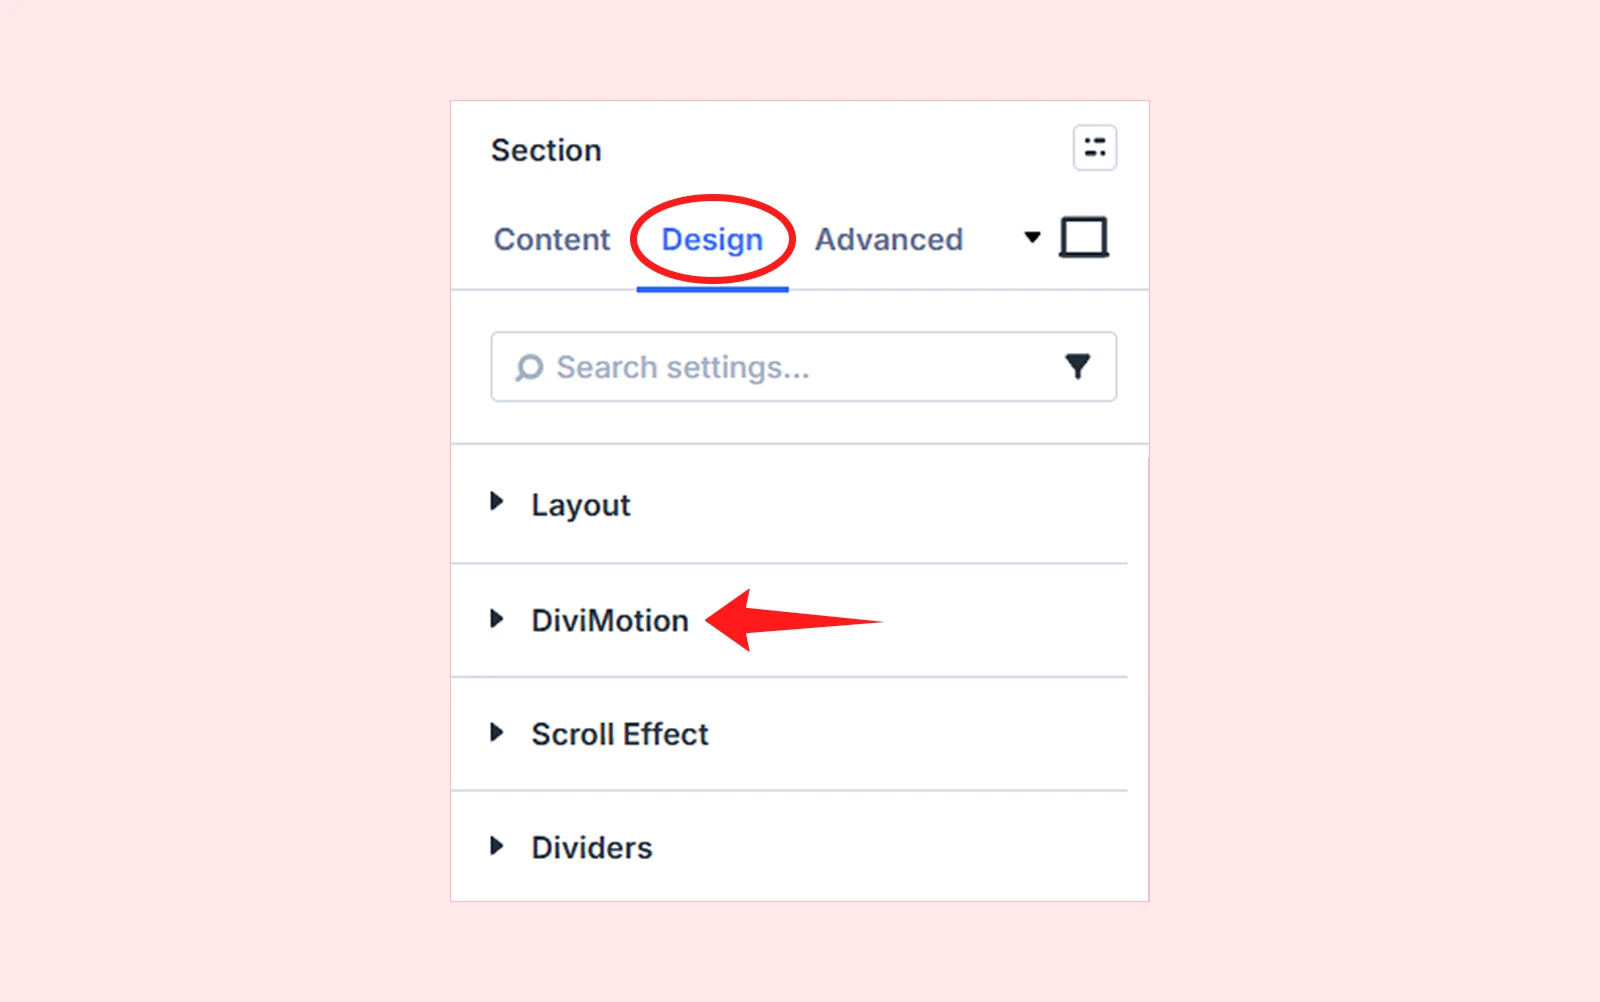
Then, go to the Design tab, scroll down to DiviMotion and expand the settings.
Step 4: Add an Interaction
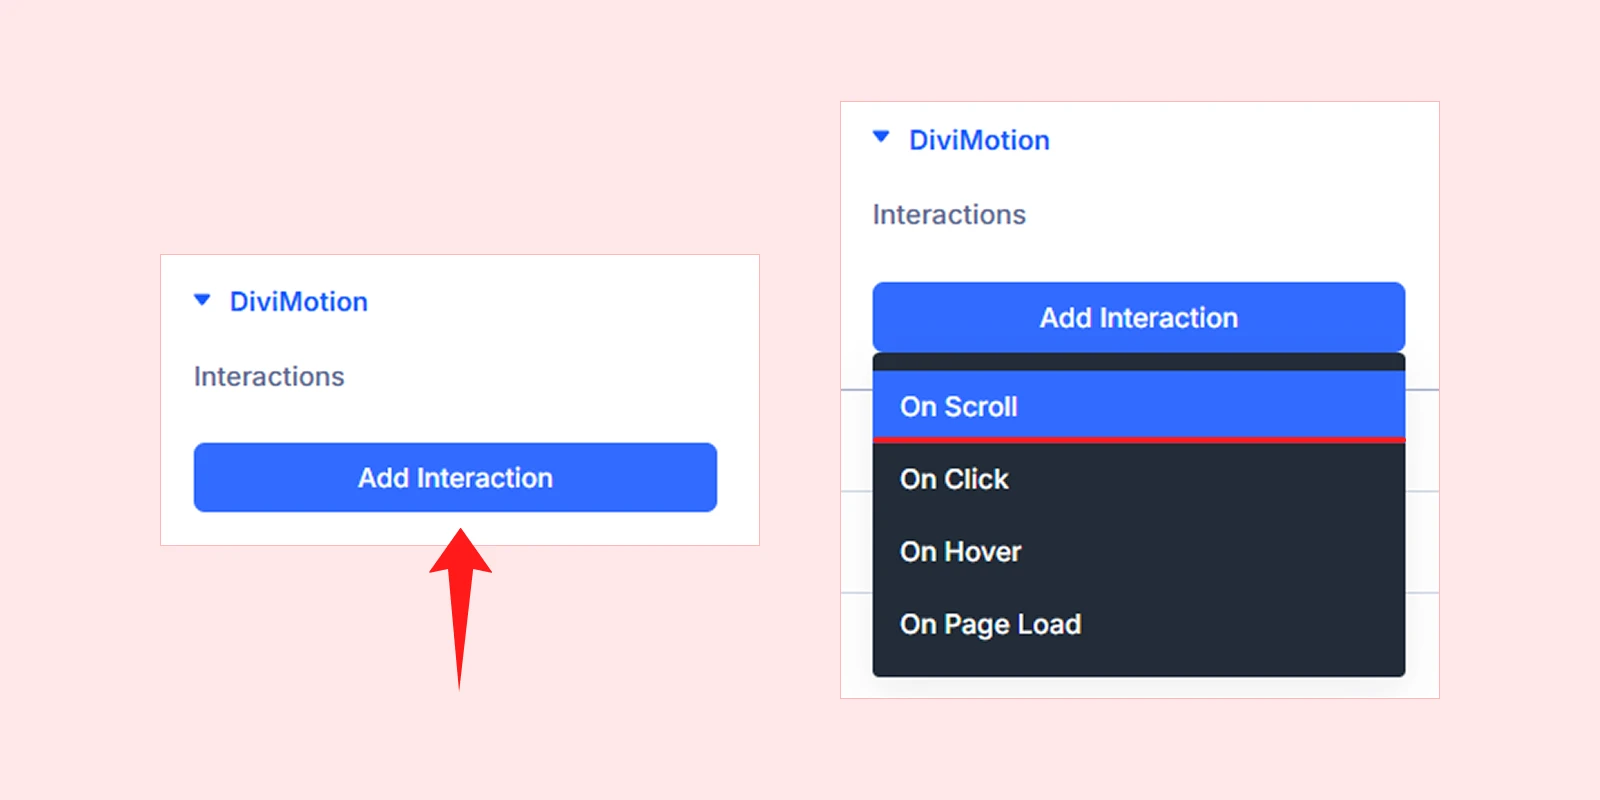
Next, click + Add Interaction and choose On Scroll as the trigger type.
Step 5: Configure Trigger Target
After selecting On Scroll, a popup will appear with the following scroll trigger related settings:
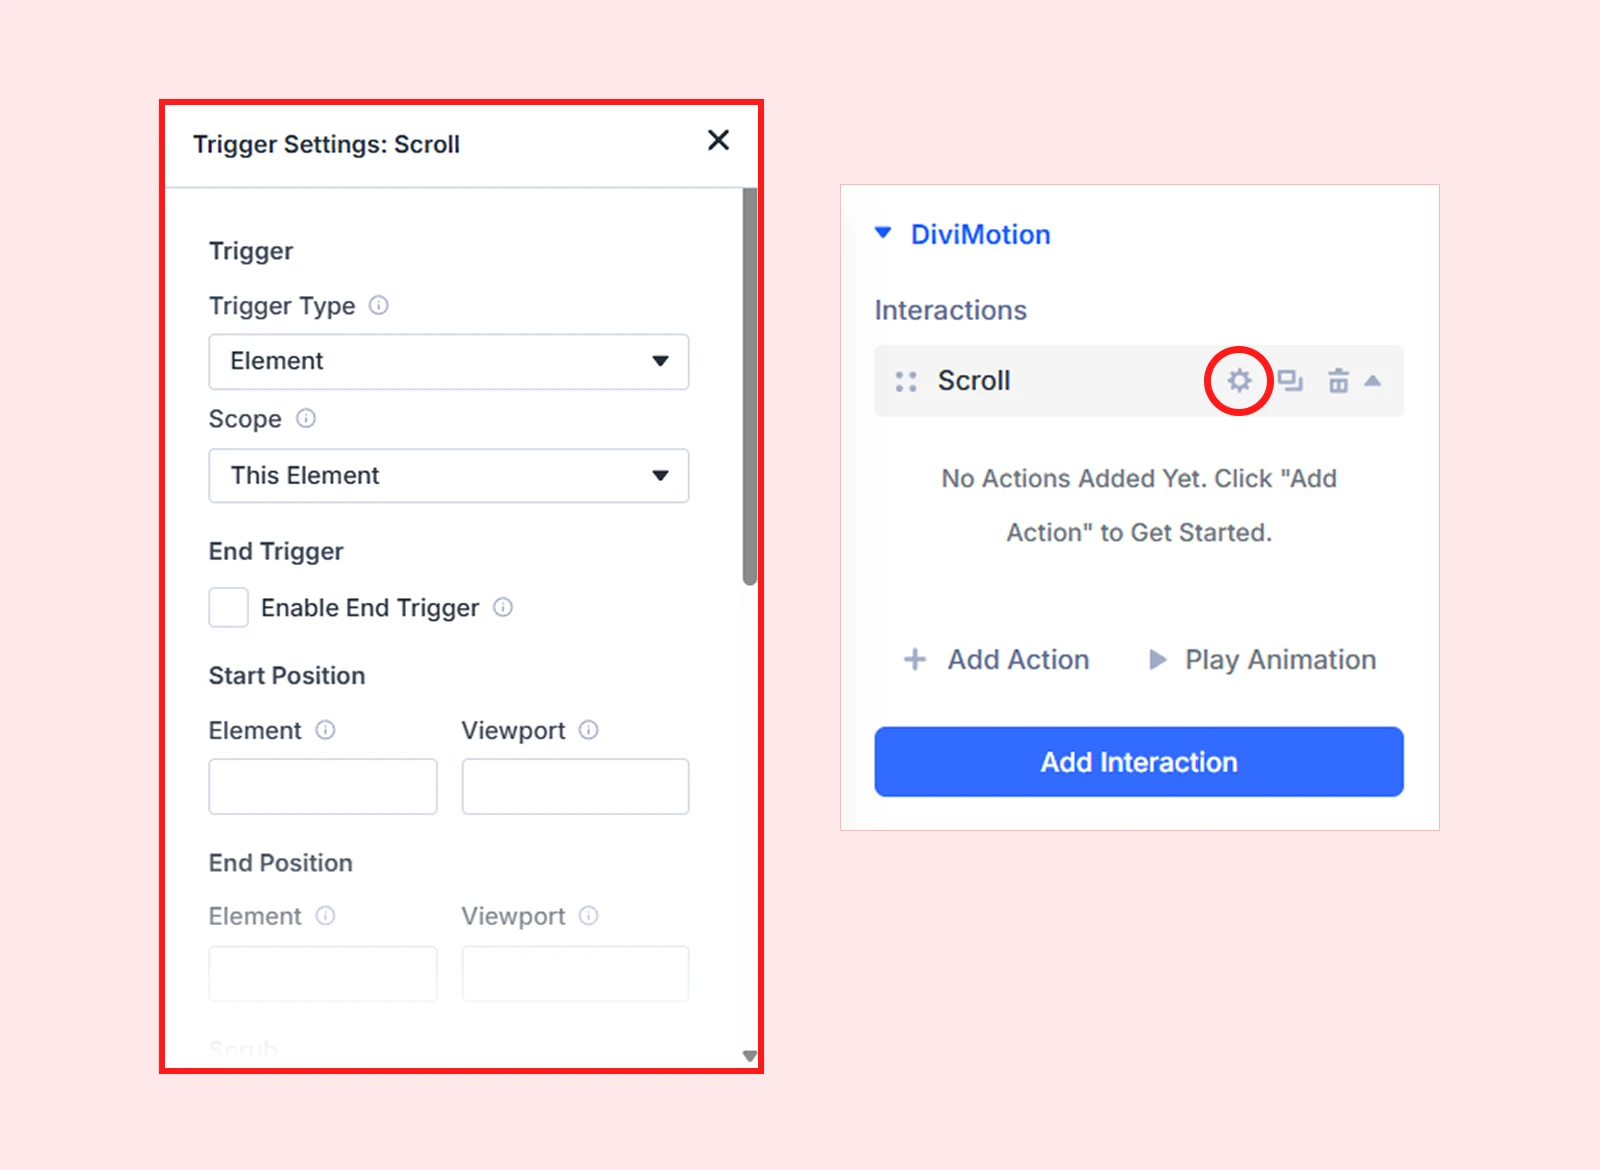
- Trigger Target: Defines which element controls the animation. You can target the current element, a specific element by ID, or any element using a custom CSS selector.
- Start Position: Set the exact scroll point where the animation will begin.
- End Position: Set the exact scroll point where the animation stops.
- Trigger Markers: Enable visual markers to debug and fine-tune the start and end points during editing.
Note: There you will also find options like Scrub, Pin during scroll, markers, and device controls to fine-tune animation behavior.
Step 6: Add an Action
Now add an action to decide what will happen when the scroll trigger runs. DiviMotion offers three action types:
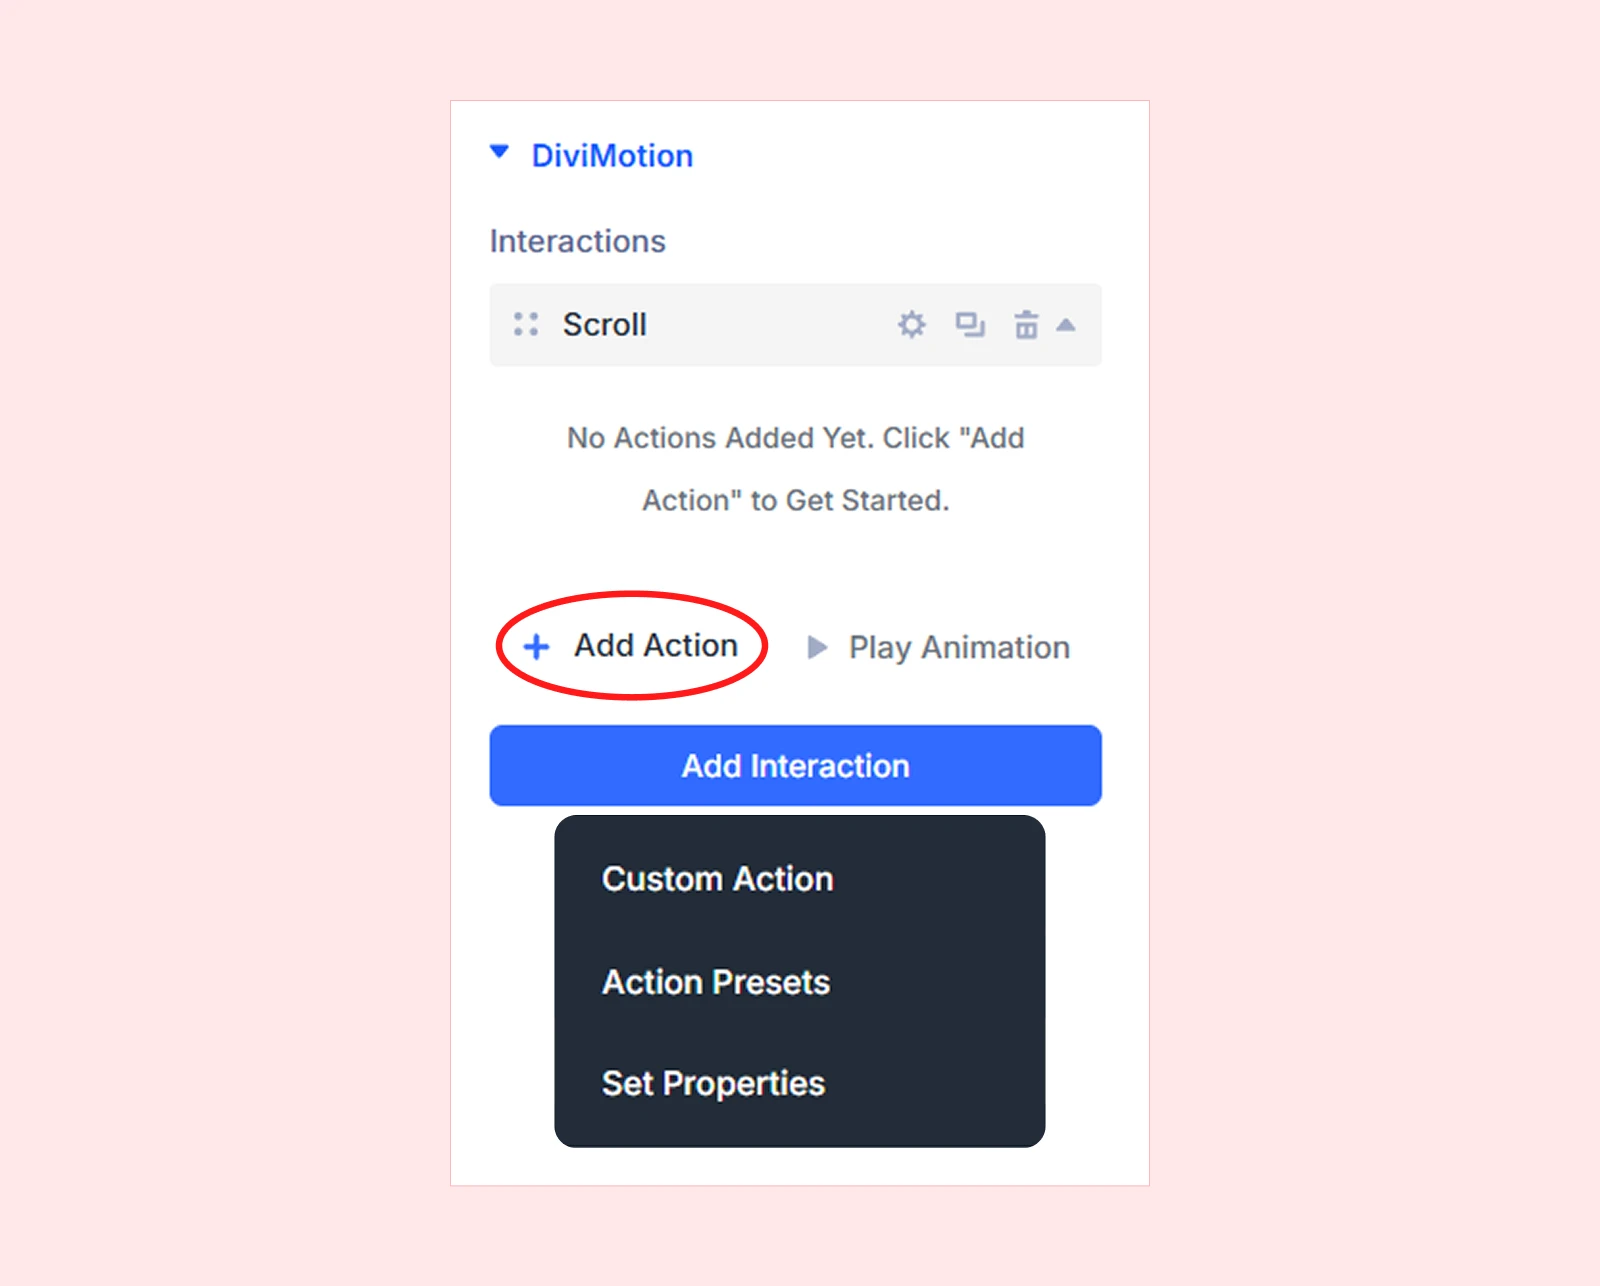
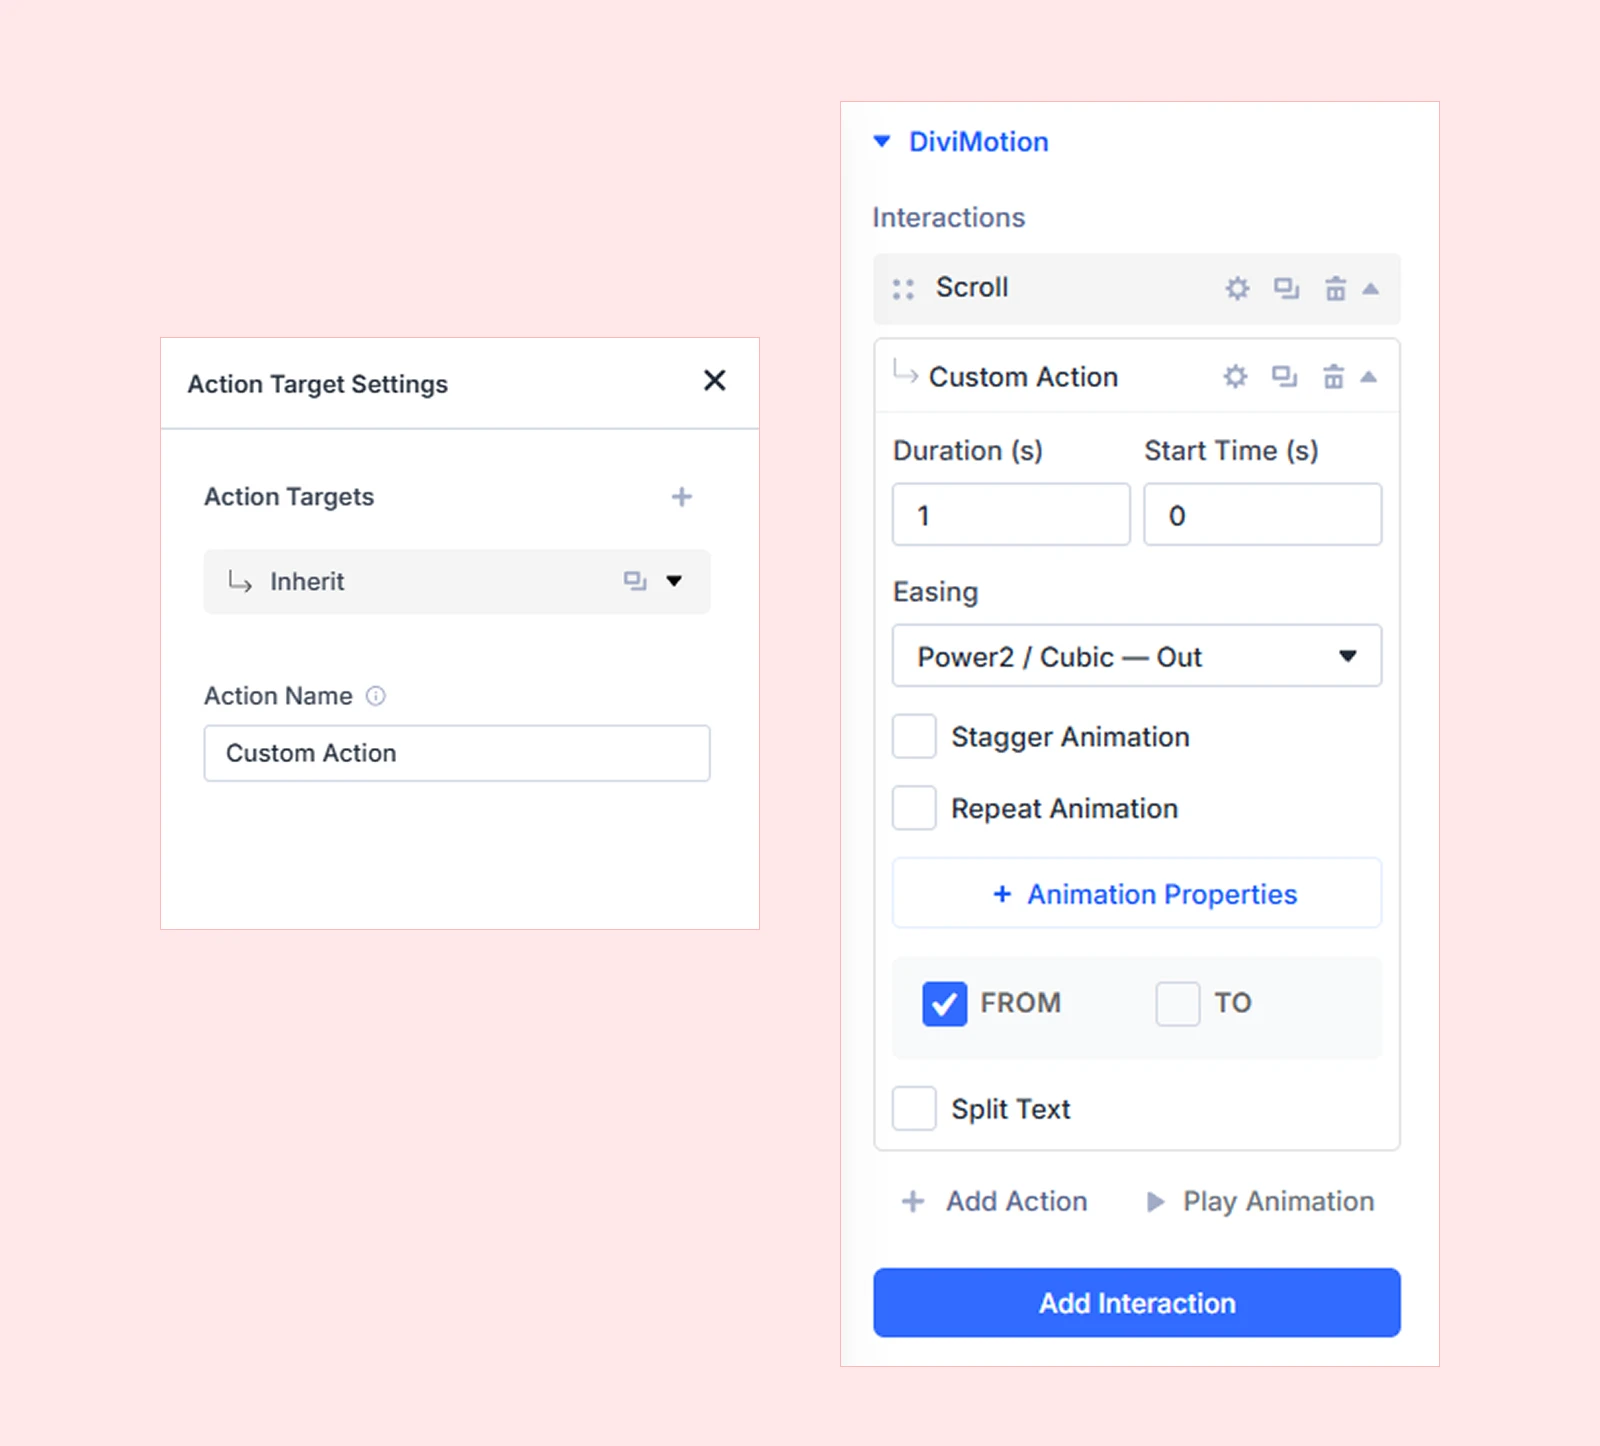
- Custom Action: Create your own animation with custom properties, timing, easing, and stagger.
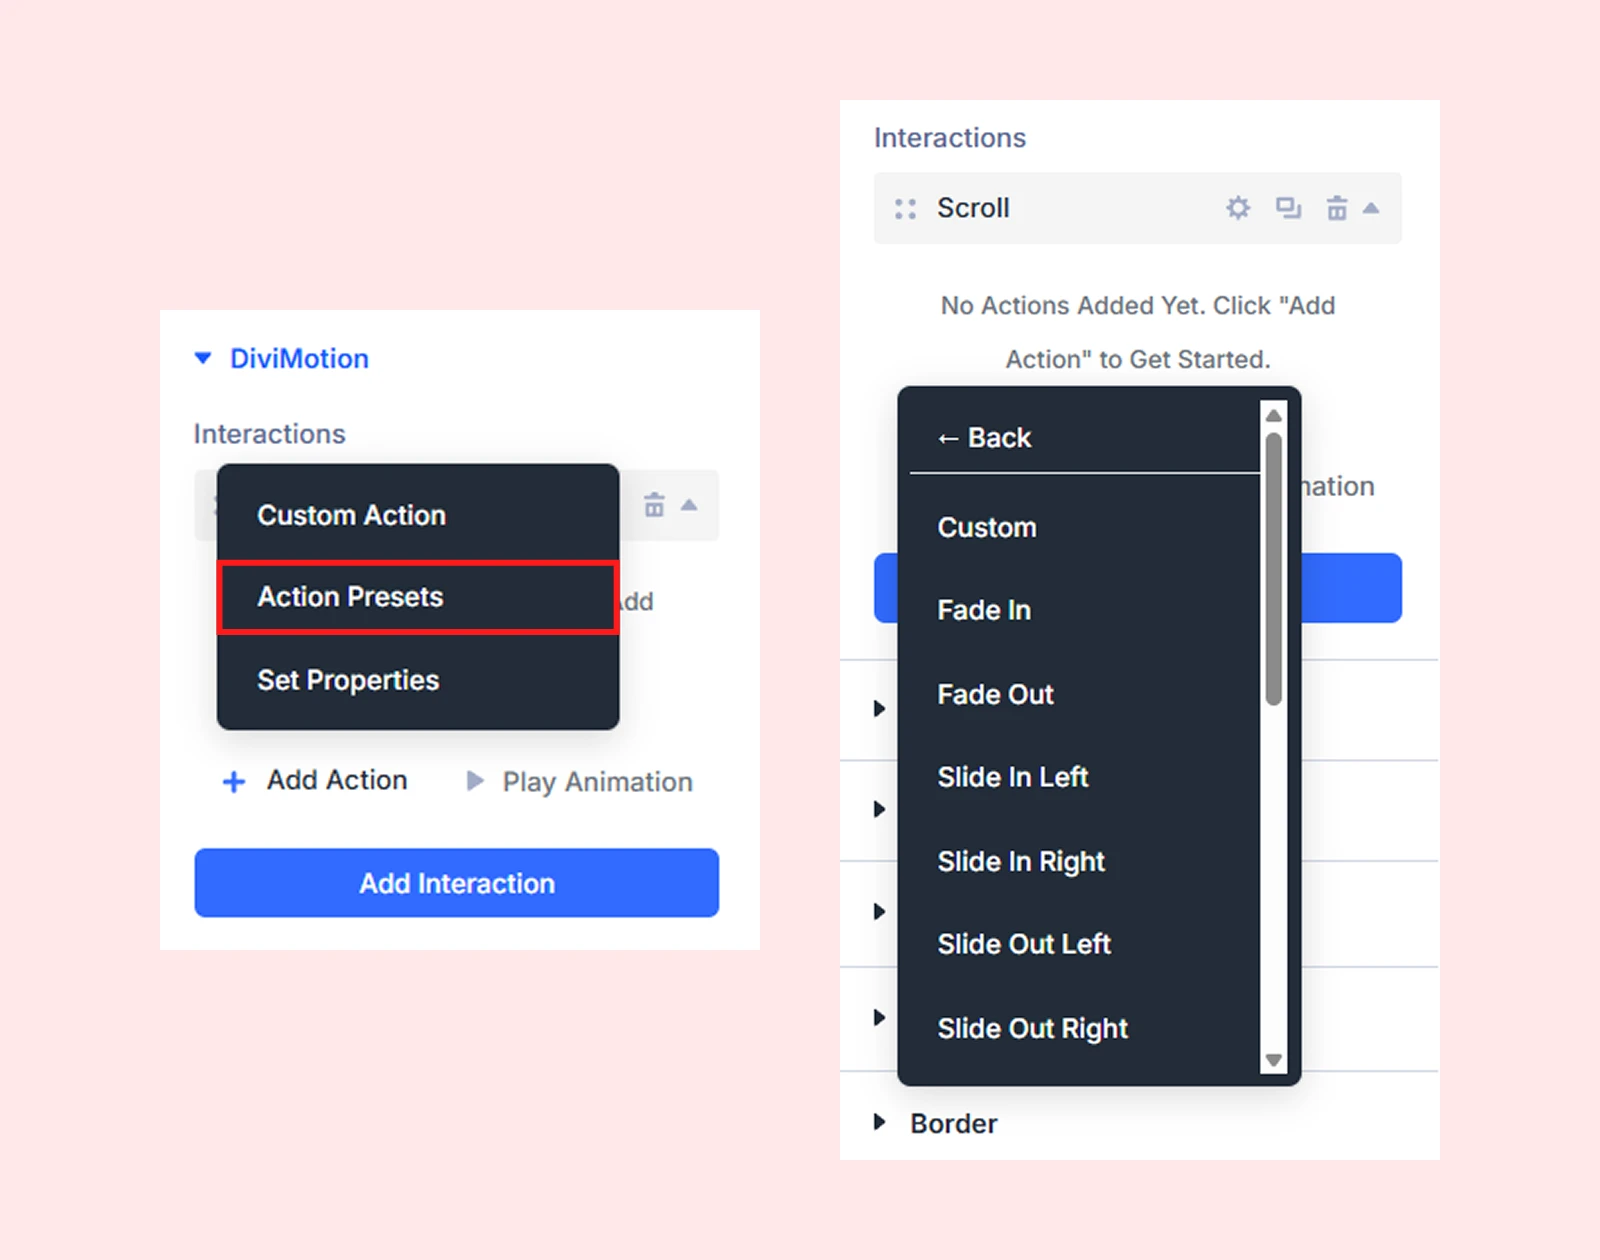
- Action Presets: Use ready-made effects like Fade In, Slide In, Scale In, Rotate In, Bounce In, or Blur In.
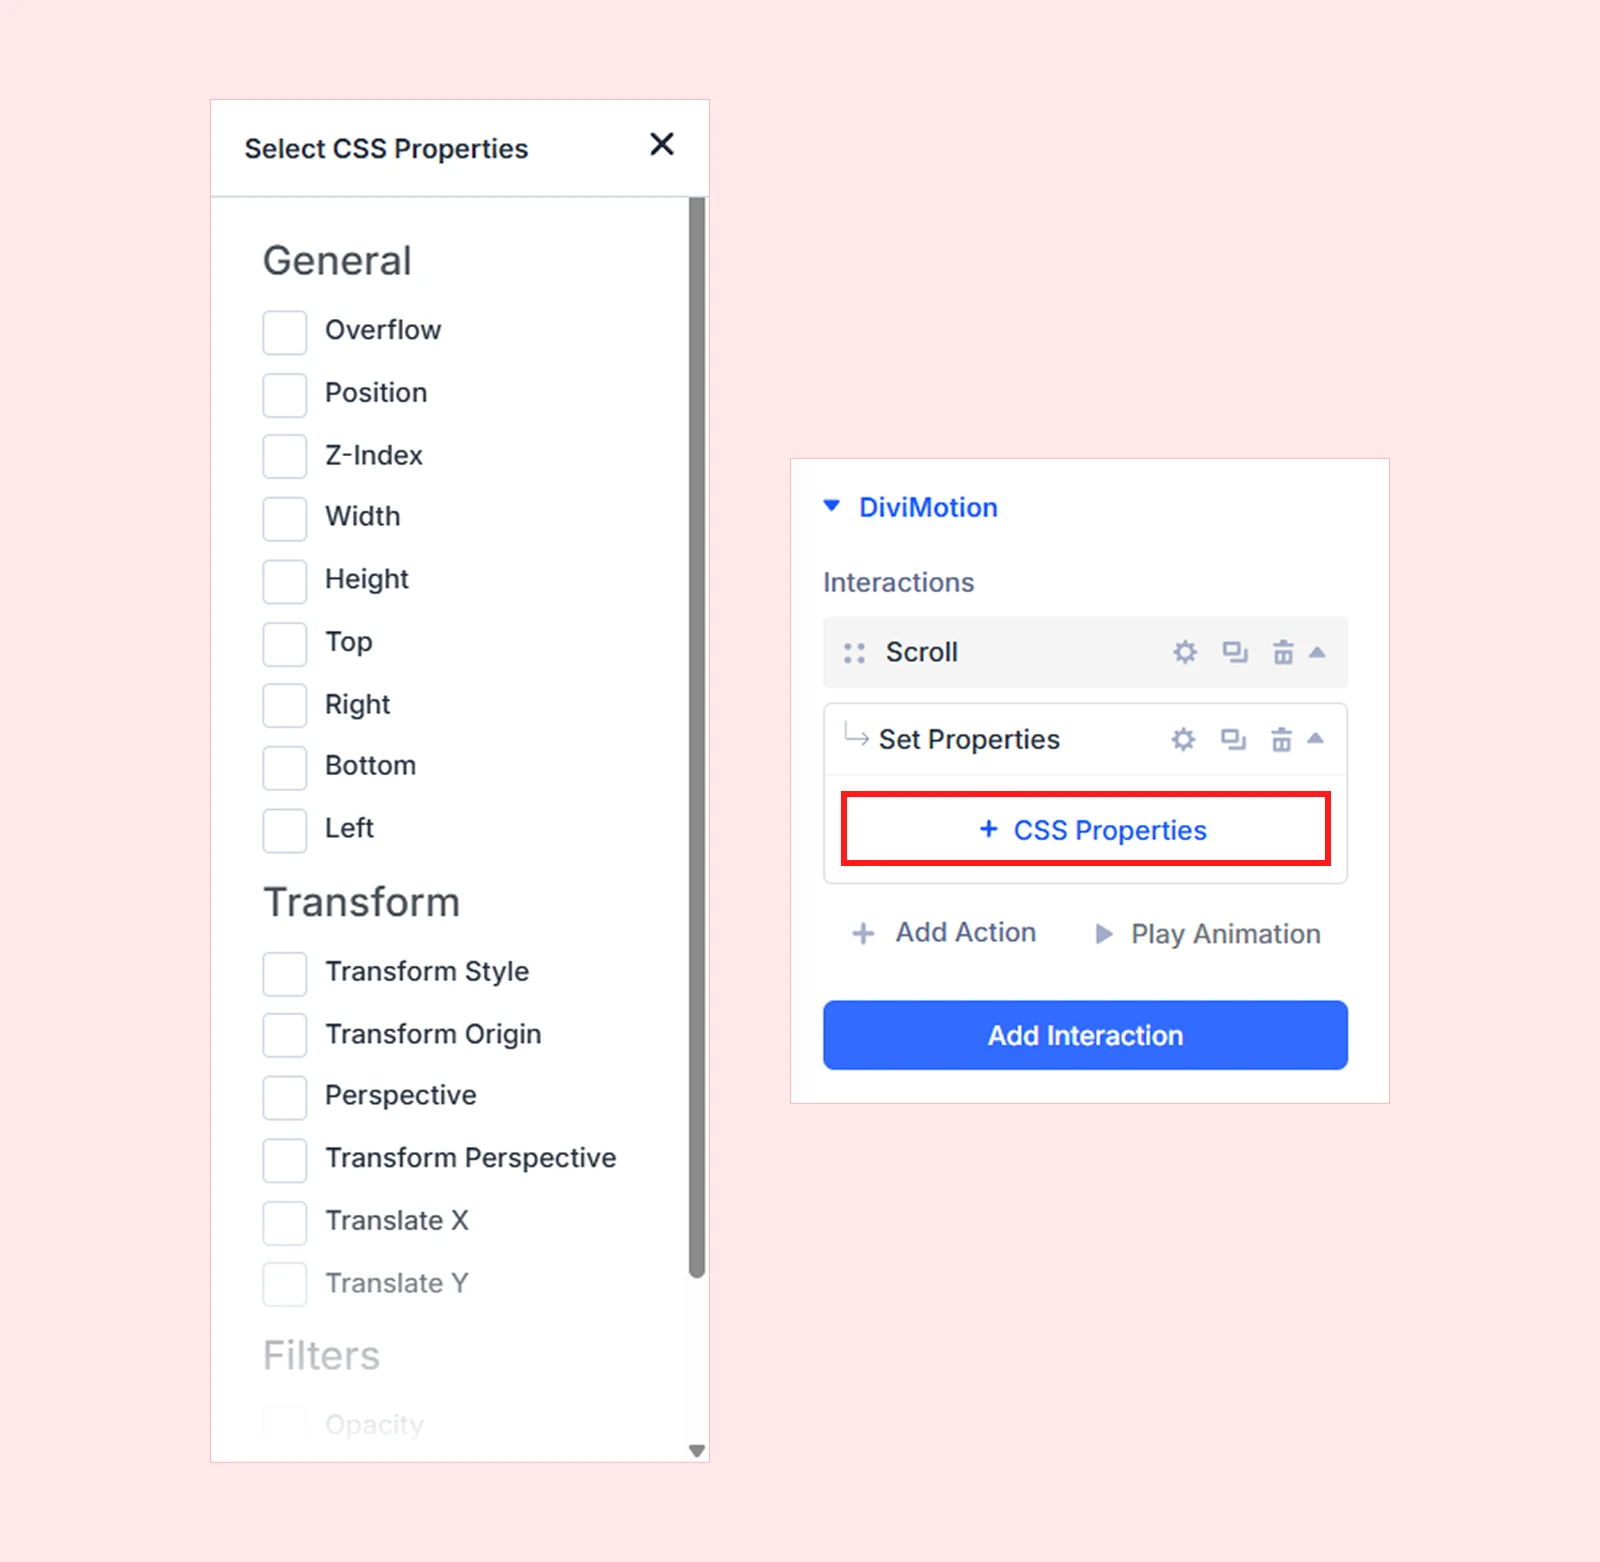
- Set Properties: Instantly change a CSS property without animation.
Choose the action that matches the effect you want to create. And you can also add multiple actions to the same interaction to build more complex scroll animations.
Note: Inside Custom and Action Preset action settings, you will find options like stagger and repeat, which help you control sequence timing and looping behavior.
Step 7: Save Your Changes
Once the trigger and action are configured, save your changes and preview the page.
Note: DiviMotion also includes a couple of extensions like Horizontal Scroll, Card Deck, and Card Stack to create more advanced scroll-based layouts with just a few clicks.
What Makes DiviMotion Different?
Let’s see what are the differences between Divi’s built-in settings and DiviMotion WordPress plugin:
| Feature | Divi Scroll Effects | Divi 5 Interactions | DiviMotion |
| Custom scroll start and end points | Limited | No | Advanced |
| Scrubbed scroll animation | No | No | Yes |
| Pinned sections | Basic sticky only | No | Yes |
| Custom selectors | No | No | Yes |
| Stagger animations | No | No | Yes |
| Multiple actions in one sequence | No | No | Yes |
| Scroll markers | No | No | Yes |
| Split text animation | No | No | Yes |
Note: We have a complete guide on how to create animated website with Divi using DiviMotion that you can have a look at.
Final Thoughts: Which Method Should You Choose?
For simple scroll animations like fade, move, scale, blur, Divi's built-in Scroll Effects and Interactions are all you need. They are easy to set up and work well for most standard layouts.
But if you need precise control over timing, scroll-synced motion, multi-step sequences, or advanced triggers, DiviMotion is the better choice. It fills the gap that Divi's native tools leave open.
A good rule of thumb: start with Divi's built-in tools. If you hit a wall with what they can do, that's when DiviMotion makes sense. You can check out the DiviMotion demo page to see the animations in action.


0 Comments