

Before diving into specific animation types, it's important to understand how DiviMotion works.
DiviMotion uses a simple three-step model to create any animation:
When → What → How = Interaction → Action → Properties
Every animation, whether scroll-triggered, hover-based, click-activated, or load-based, follows the same three-step workflow.
This guide explains how these three components work together so you can confidently create any animation type.
Here's how you'll apply this three-step model when creating any animation:
Accessing DiviMotion Controls
- Open your page in the Divi Visual Builder
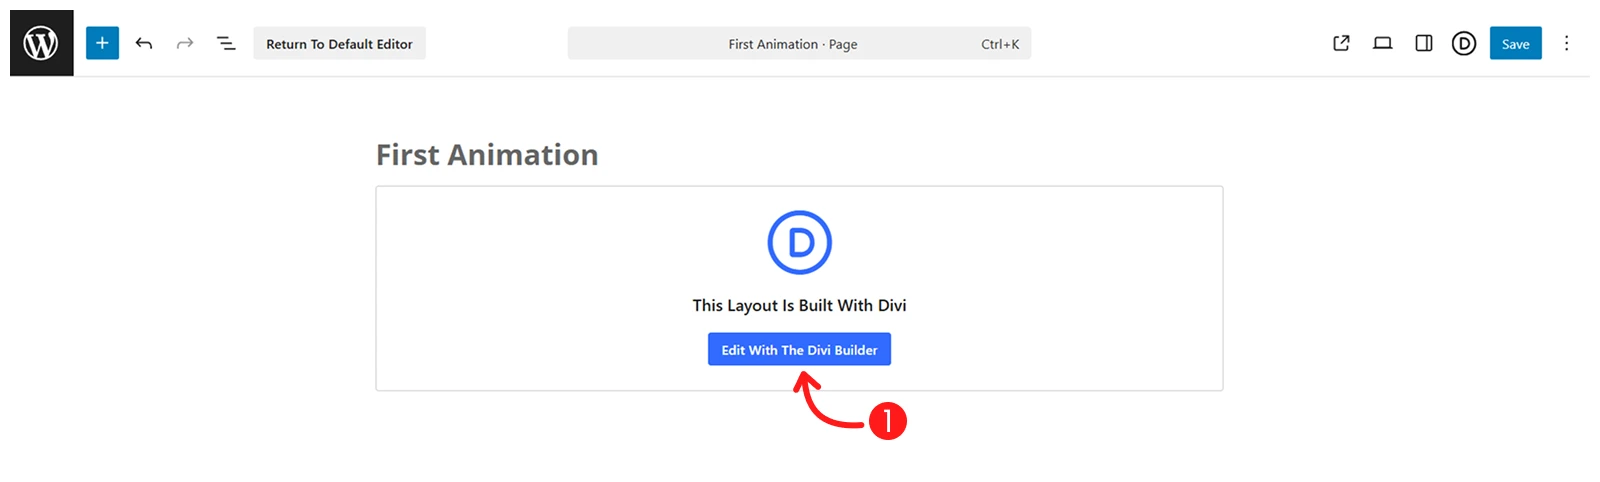
- Click the settings icon on any section, row, column, or module
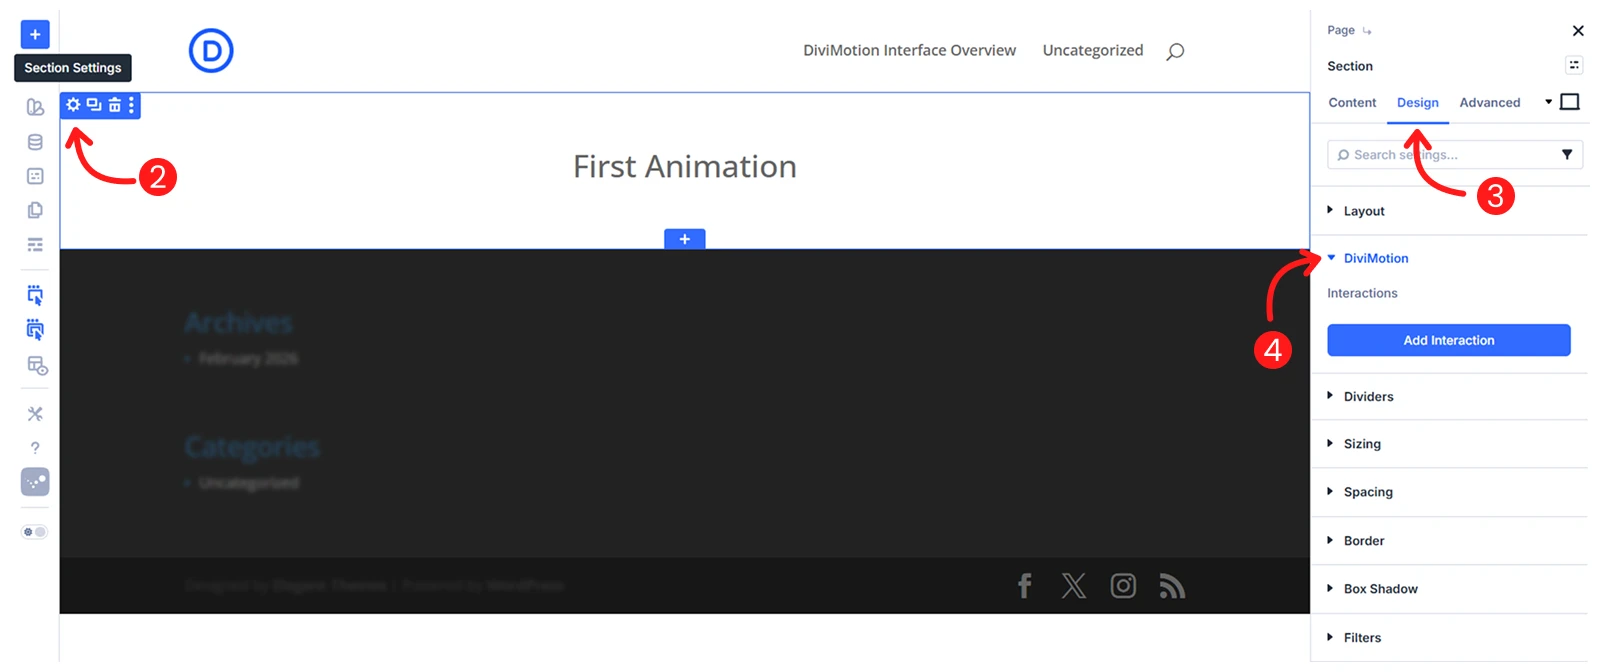
- Switch to the Design tab
- Scroll down to the DiviMotion section and expand it
Step 1: Add an Interaction (When)
The first step is telling DiviMotion when the animation should happen.
To add an interaction:
- Click + Add Interaction
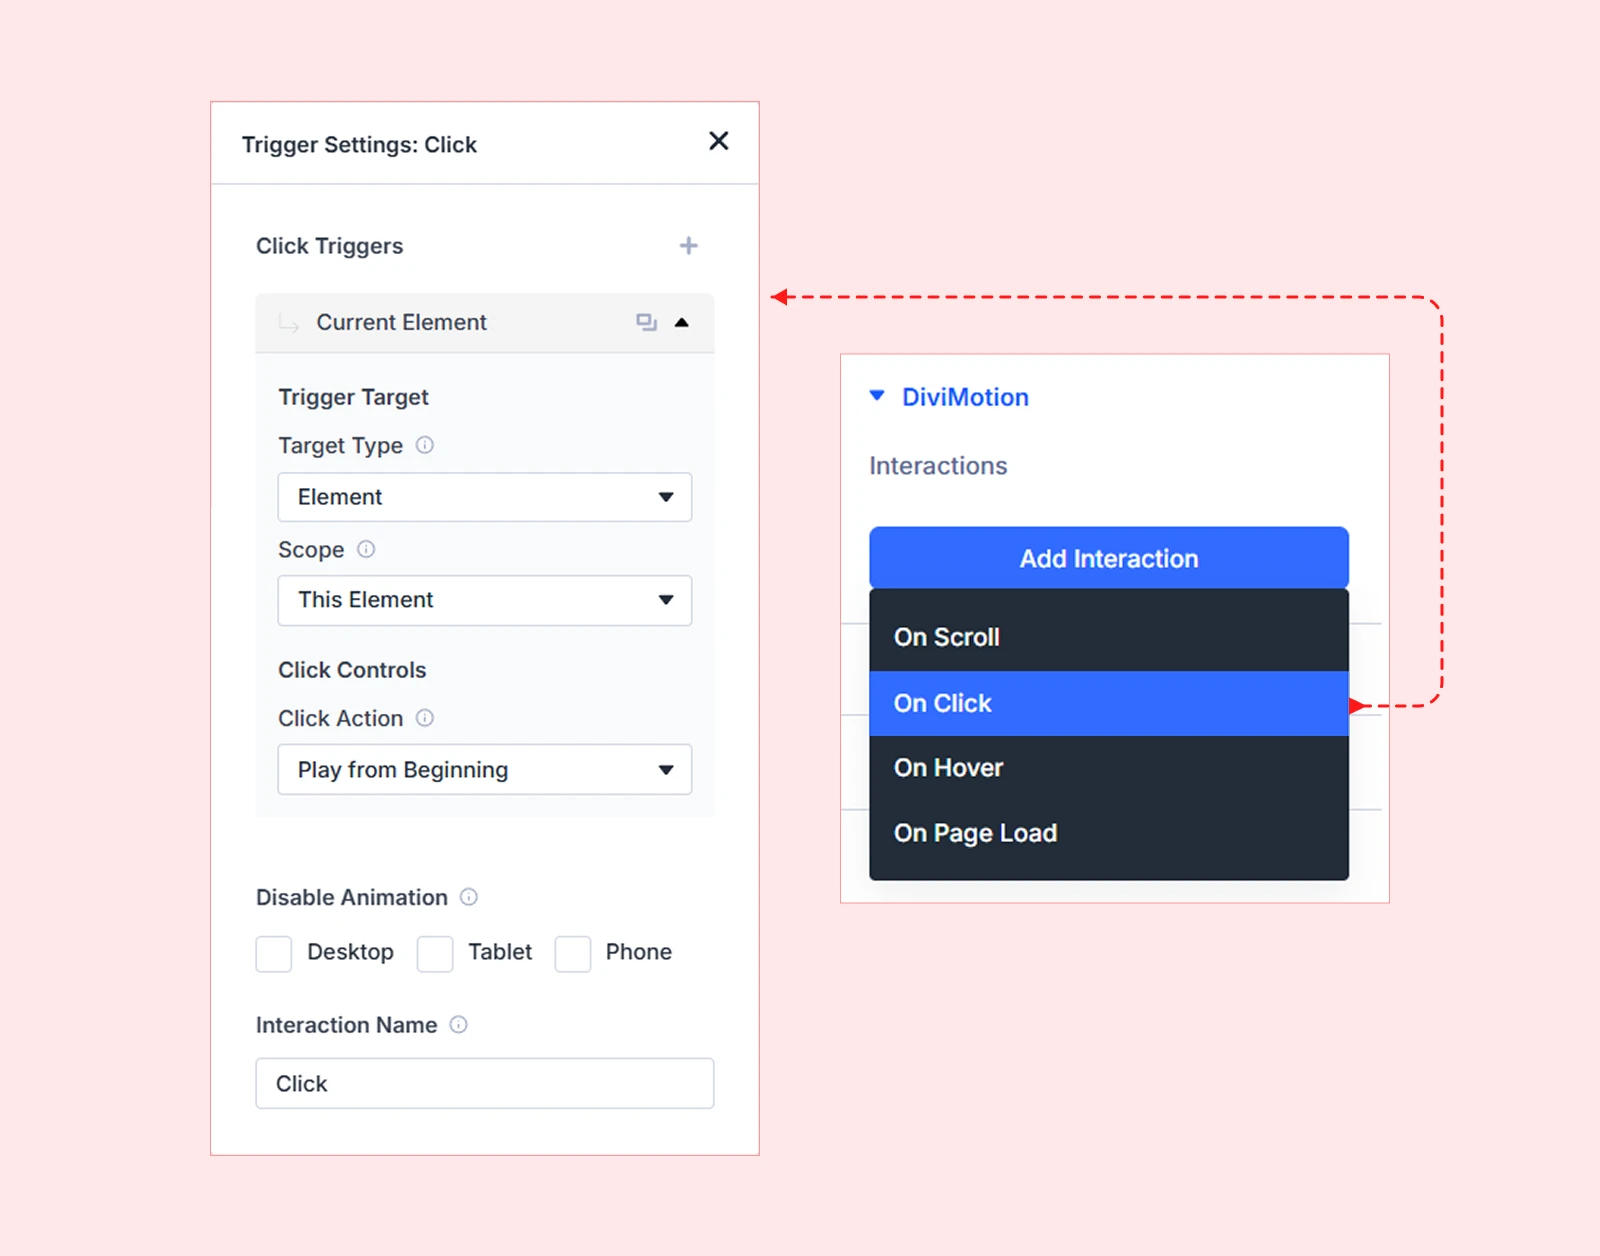
- Choose your trigger type (Scroll, Hover, Click, or Load)
- Configure trigger-specific settings
| Note: Each interaction can contain multiple actions for creating complex sequences. Not sure which trigger to use? Review the Interaction Overview Guide after completing this workflow overview. |
Step 2: Add an Action (What)
Now you'll tell DiviMotion what should happen when the interaction is triggered.
To add an action:
- Inside the interaction card, click + Add Action
- Choose Preset (predefined animations), Custom (build from scratch), or Set Properties (change element states like visibility, position, or styling)
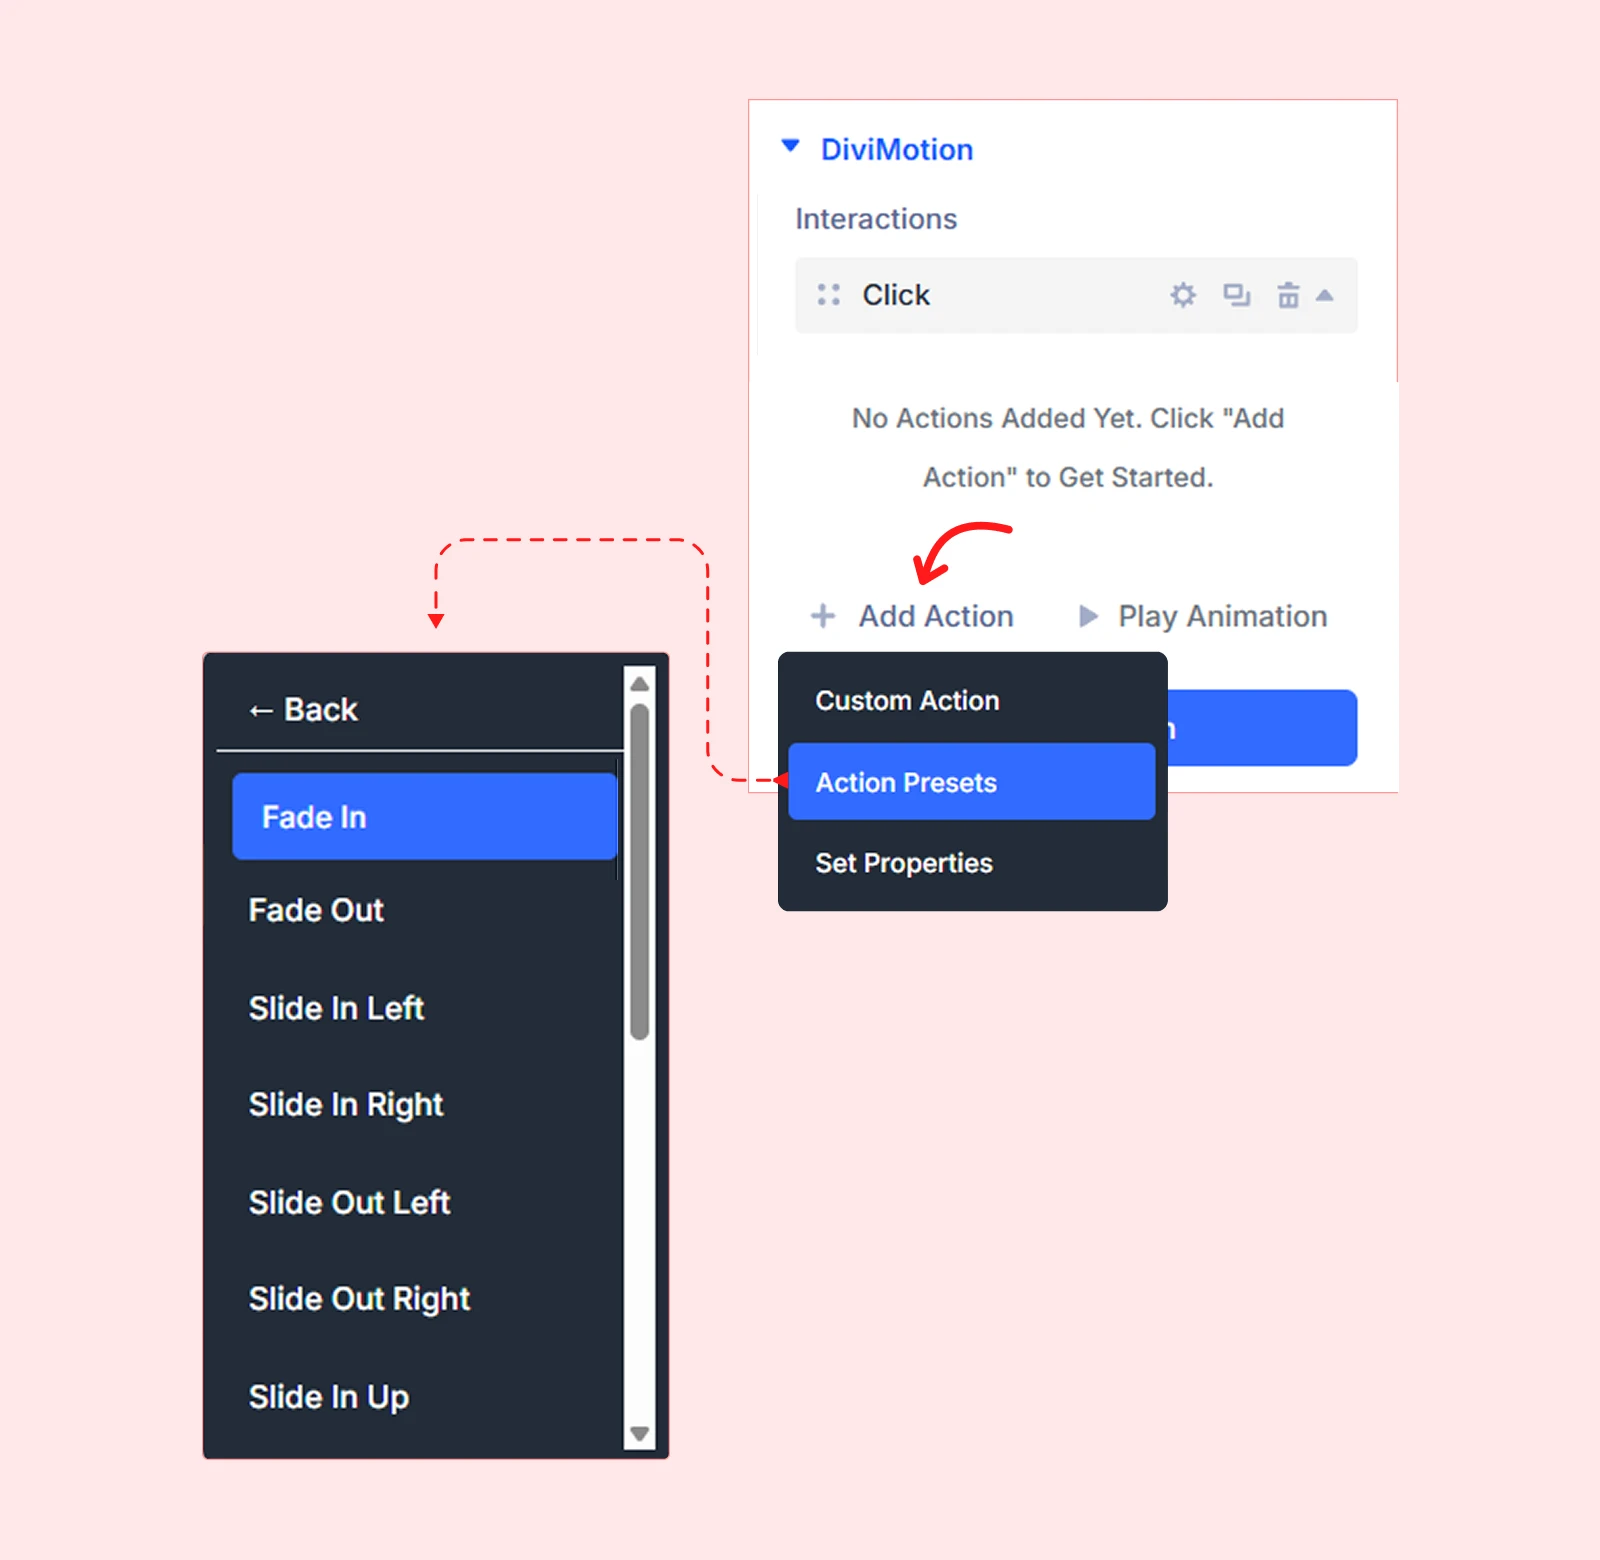
- Configure action settings (target, duration, delay, easing)
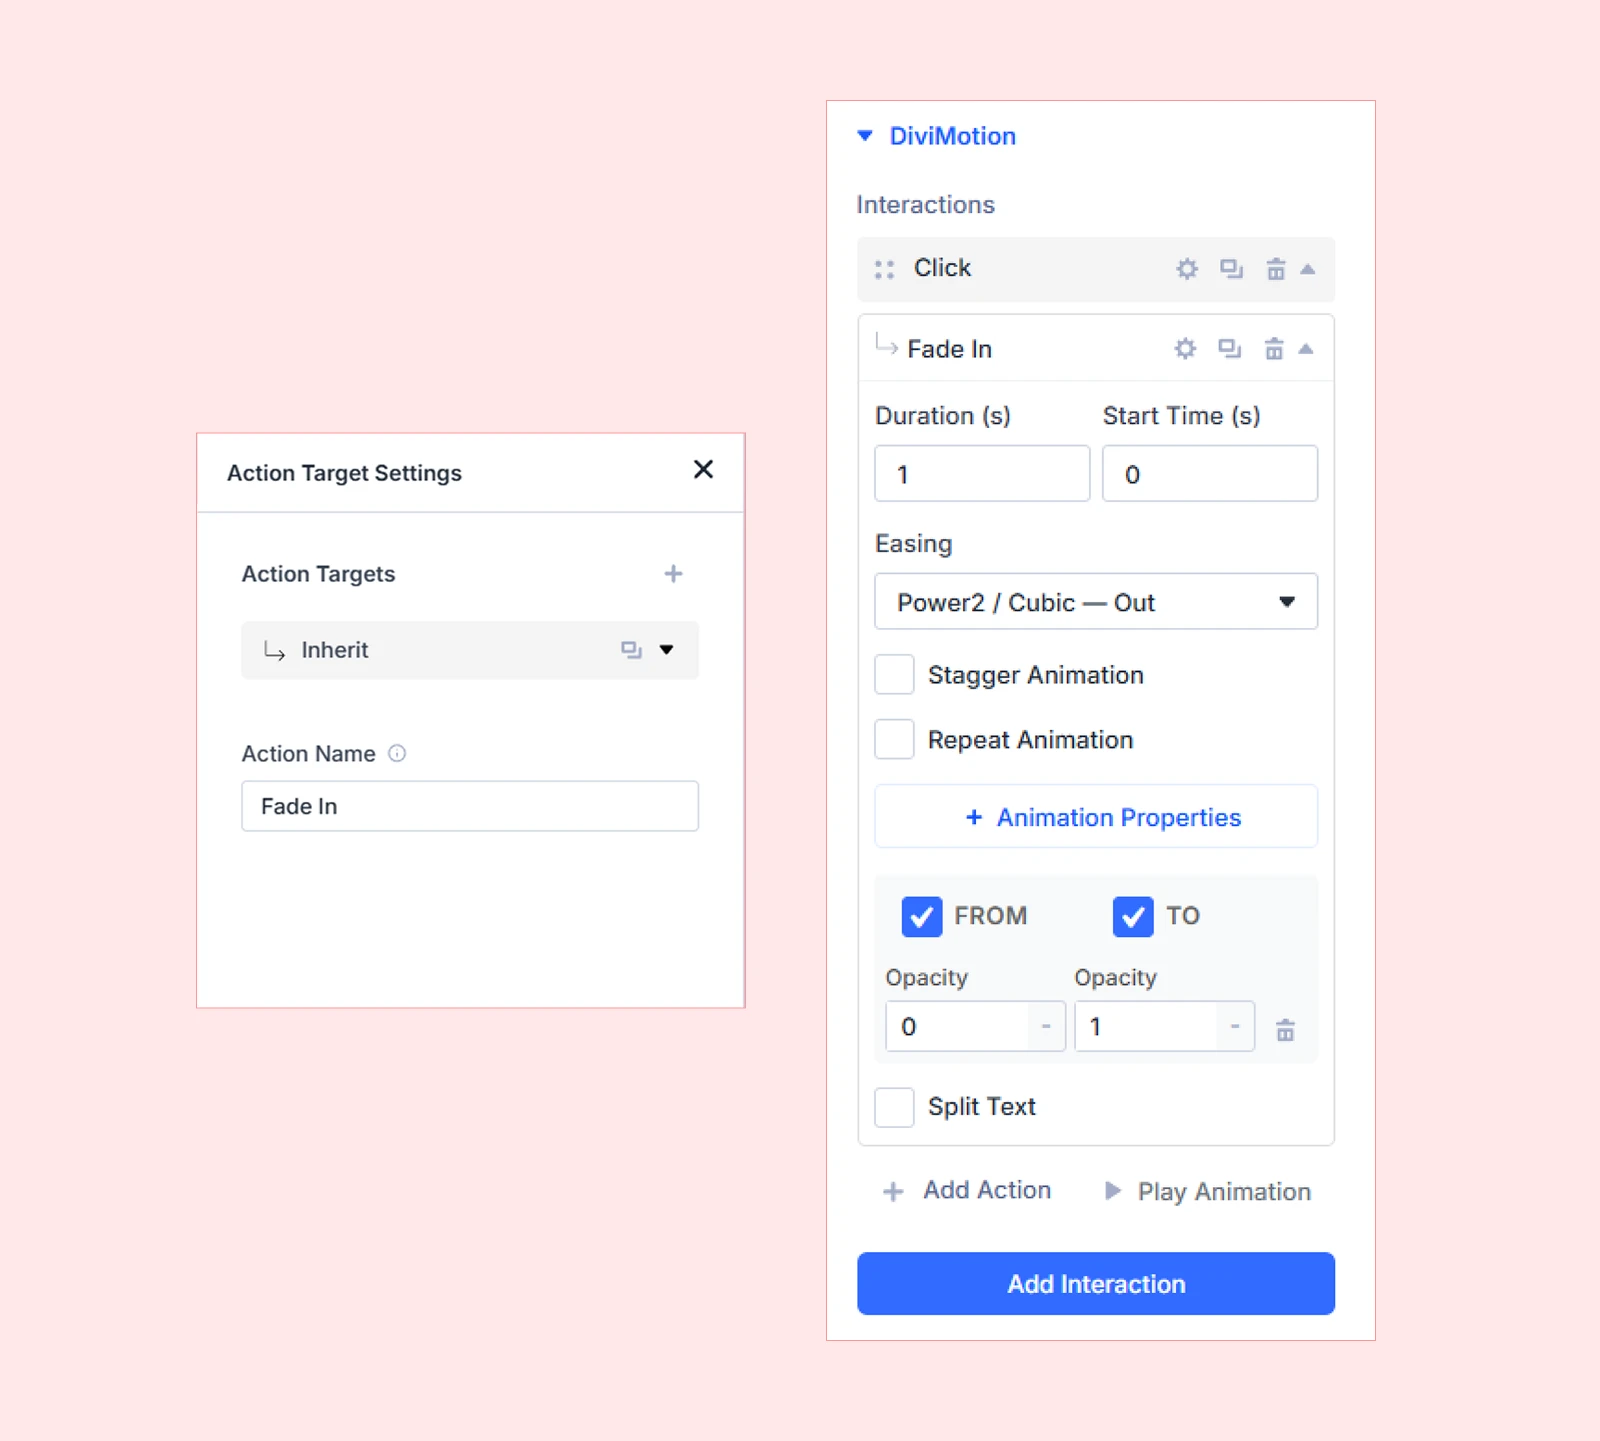
| Note: You can add multiple actions under each interaction for multi-step animations. To learn more about preset vs. custom actions, check the Actions Overview Guide after understanding this workflow. |
Step 3: Set Properties (How)
Now you define how your element changes during the animation.
For Preset actions, DiviMotion automatically sets up animation properties with optimized default values. You can customize these if needed.
For Custom actions, you'll manually add and configure each animation property.
To add or customize properties:
- Expand Animation Properties under the action
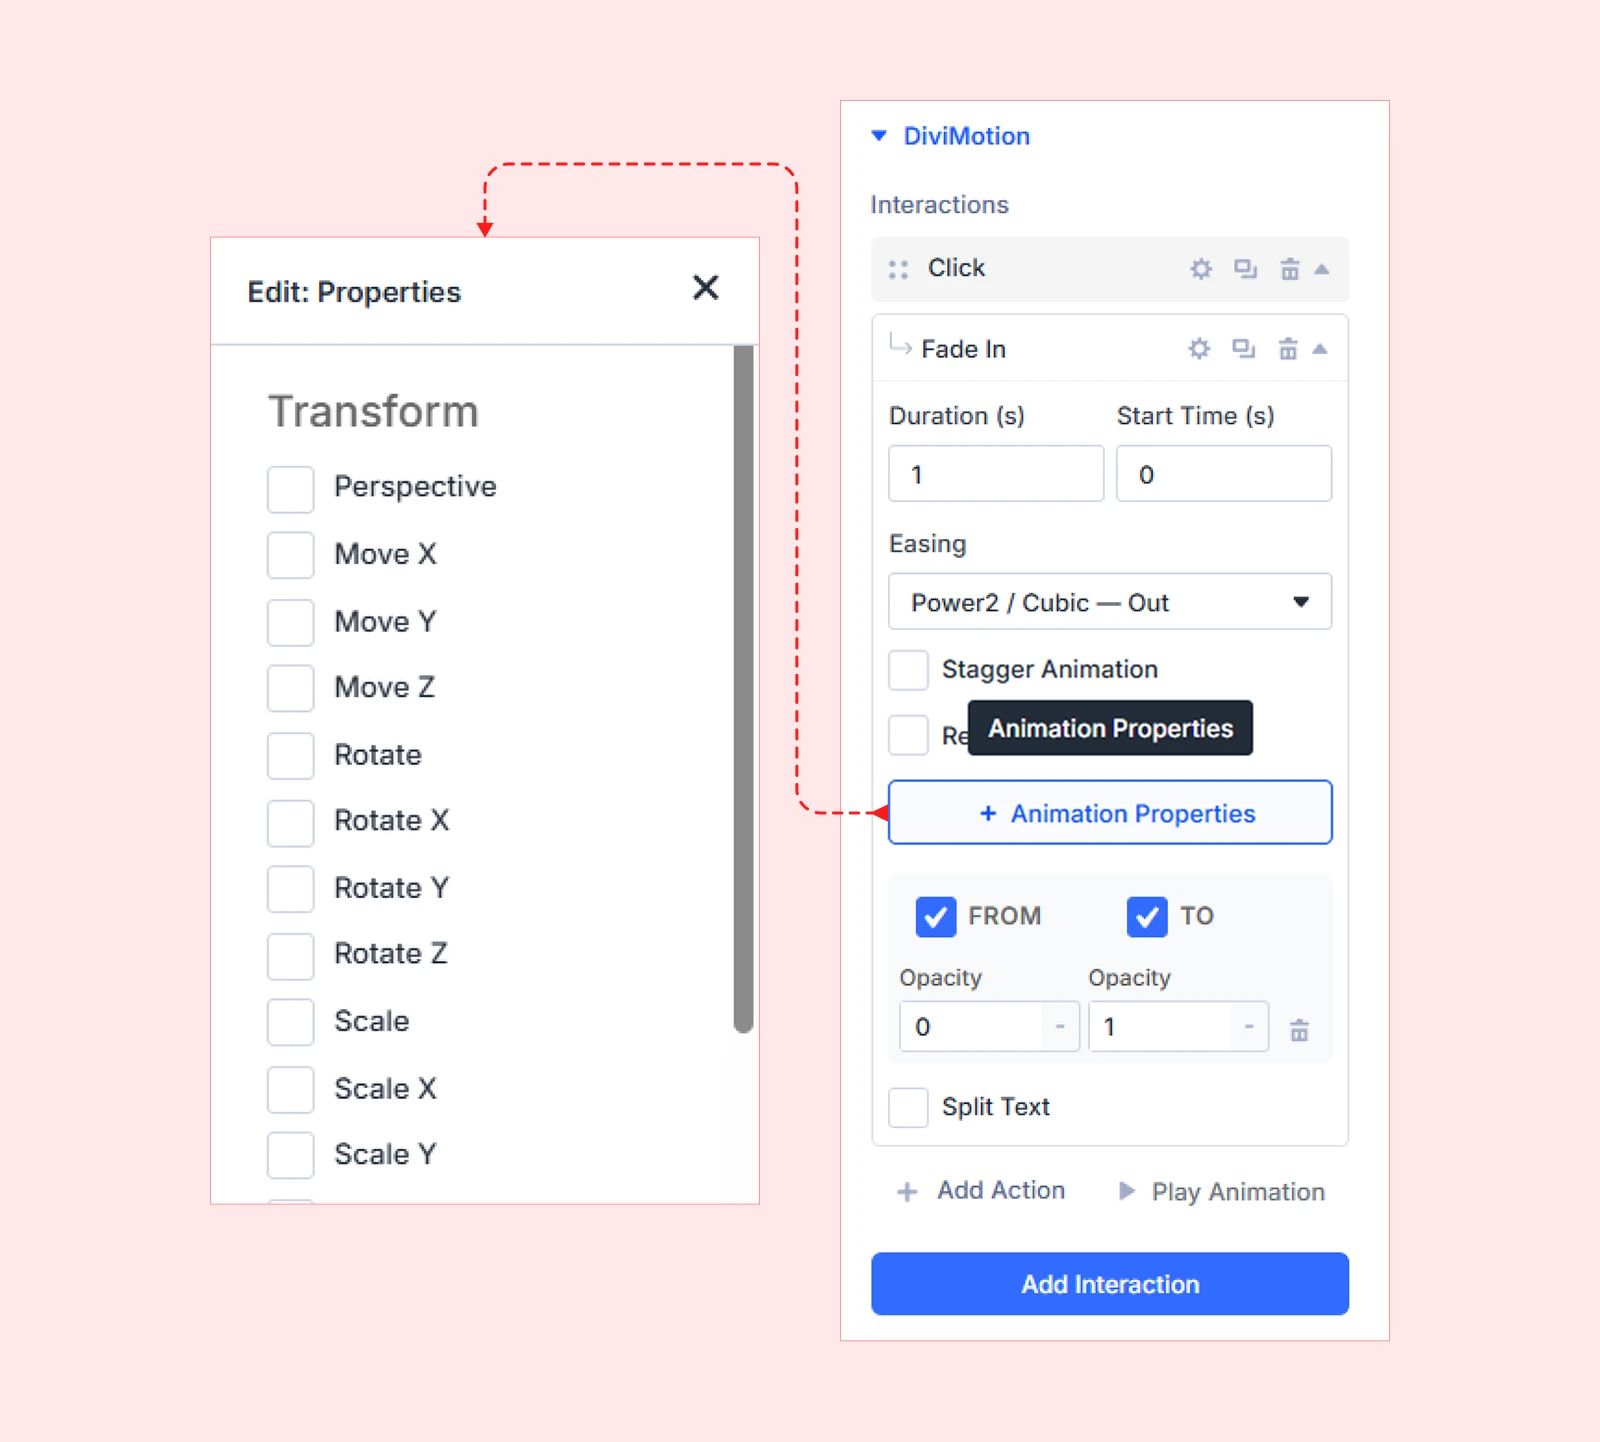
- Adjust property values like Opacity, Position (X, Y), Scale, Rotation, and more
- (Optional) Add CSS Properties like z-index or overflow for advanced layout control
| Note: To learn about each available property in depth, check the Animation Properties Guide and CSS Properties Overview. |
Preview Your Animation

Click Play Animation (next to the “+ Add Action” button) to preview your animation directly inside the Visual Builder — no saving, reloading, or publishing required.
Make adjustments, hit play again, and repeat until your animation looks just right.
What's Next?
Now that you understand the core workflow. Pick an animation type and dive into the detailed guide!


